Using the Web Services API with Swagger
Introduction
In this tutorial, we will provide a brief example of using web services through Swagger. In this instance, we will demonstrate how a user can retrieve their information and create a group within their organizational node.
Services API
To invoke the services exposed in Cloud installations, you should use the URL https://{workspace}.api.qflowbpm.com, where {workspace} should be replaced with the name of your workspace without spaces. You can access the Swagger interface through the link https://{workspace}.api.qflowbpm.com/swagger/ui/index.
It is important to set the security protocol to “HTTPS” to use these services correctly. This can be done in the “Schemes” field at the top left of the interface.
Fig. 874 HTTPS protocol
1- Authentication
Before being able to invoke any methods of the web services, it is necessary to authenticate. Authentication can be done through a token obtained using the “Token” method in the “Auth” controller:
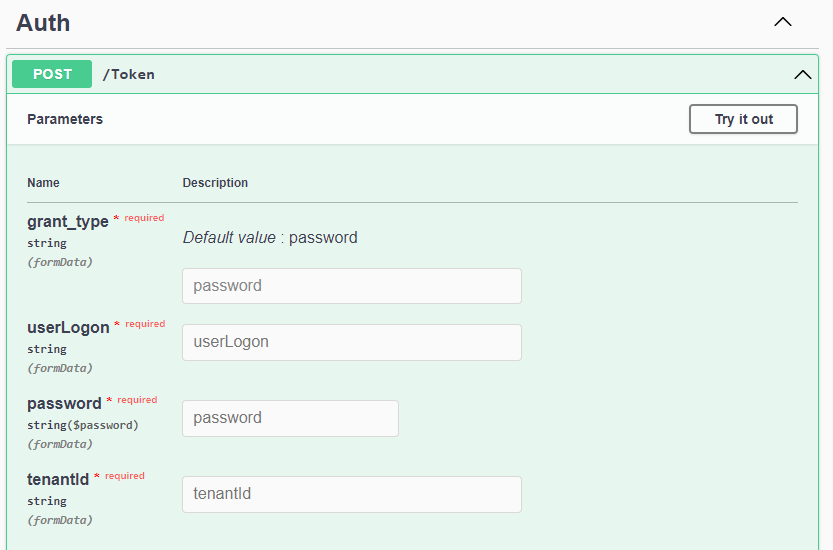
Fig. 875 “Token” method
This method returns an authentication token when provided with user credentials: logon (in the form of {securityProvider}\{username}, replacing {securityProvider} with the provider’s name and {username} with the user’s login who will use the services), password, and the identifier of the workspace in which they are located. You can obtain this identifier by contacting us at “info@qflowbpm.com”.
Once you have filled in the data, you can execute the method using the “Try it out” button located in the top-right area of the method section.
If the method executes successfully and the credentials are valid, you will receive a response, which will be displayed below the fields where you entered the credentials.
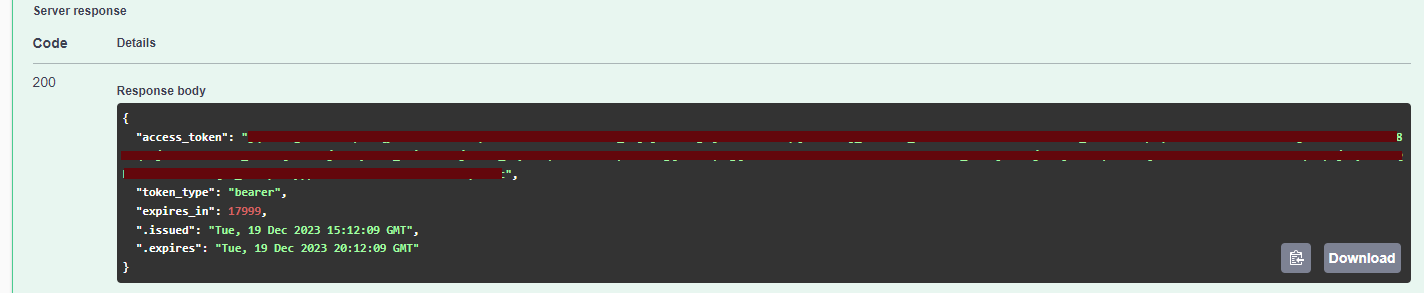
Fig. 876 “Token” method response
To authenticate, you need to copy the code from the “access_token” field (without quotes) and go to the “Authorize” option located in the top-right corner of the Swagger interface.

Fig. 877 “Authorize” option
Finally, to complete the authorization, you should go to the “Authorize” option and enter “bearer {token}” in the text field, replacing {token} with the code you copied. Pay attention to the space between the word “bearer” and the code.
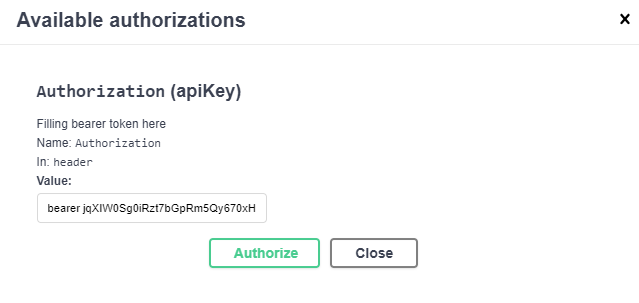
Fig. 878 Authorization token example
Once you have entered the code, select “Authorize” to authenticate. Now, you should be able to use the services.
2- Using methods
For this example, let’s start by retrieving user information. We do this to obtain data such as the user’s identifier and the identifier of the node to which they belong, which will be necessary for creating the group.
We begin by invoking the GetUserByLogon method of the WebOrganization controller to obtain user information based on their logon (the same one used to obtain the token).
As a result of this method, you will obtain a JSON object containing user information, where the property of interest is “NodeId”, which represents the identifier of the node to which the user belongs. This is the node where we want to create our group.

Fig. 879 GetUserByLogon method response example
With this information, you can proceed to use the CreateGroup method of the WebOrganization controller to create the group.

Fig. 880 CreateGroup method
This method takes a JSON object with properties such as “Name”, “Description” and “GroupNodeId.” You can edit these data using the “Try it out” option within the method window, allowing you to modify the object being sent. Assign a name and description for your new group, and provide the identifier of the node where you want to create the group. This identifier was obtained in the previous step.
Once we modify the input object, we click “Execute” to run the method. If everything goes well, we will see a response with a status code of 200 and an identifier, which is the identifier of the created group. This information is useful as we can verify that it has been successfully created by using the GetGroup method of the WebOrganization controller, passing the identifier obtained from the CreateGroup method as a parameter. If the method returns the details of the group we created, then we can confirm that the group was created successfully.