Design a complaints handling flow
Introduction
This tutorial briefly explains the main functionalities of Qflow Design by creating a complaints handling flow.
This tool allows the user to design flows, define application data, template roles and other elements that form the basis of the flows.
Complaint flow
A company wants to improve its customer complaint service system though a Qflow process.
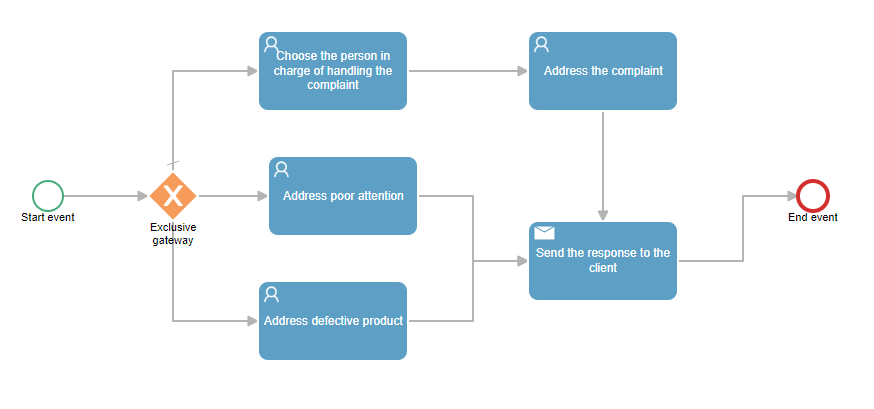
The complaint flow that they will implement will be developed as follows:
A customer calls the company to express a complaint
The call receptor starts a Qflow process with the following data:
Customer name
Customer email: it is going to be used to send a message once the complaint has been addressed.
Complaint text: complaint description
Text to send to the client: the text that will be sent to the customer once the complaint has been addressed.
Determine if the complaint is due to poor attention, defective product or another reason.
The complaint is addressed to a department depending on the complaint option that was assigned: product manager, customer service manager or the business manager who chooses an employee to handle the complaint.
The person in charge of handling the complaint writes a text to send by email to the client.
An email message is automatically sent to the customer, using the text entered in the previous step.
The flow ends.
Qflow process construction
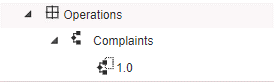
Crate a package where the “Complaint” template will be saved. You can also use the “Create process container subpackage” option, when creating a template, in which case Qflow will automatically create a package containing it.
Add the elements to the flow design
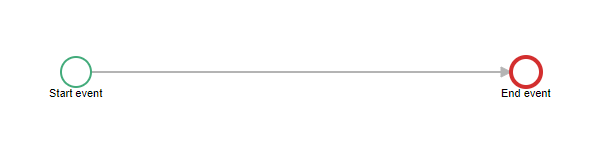
After creating the template its design editor will open, in which there will be a start and finish event, and it is where all the steps that occur in between will be added.
An event represents something that happens in the flow. These can be classified as Start Event, Intermediate Events, and End Event.
The start event determines the start of a flow. It also represents the point at which a user starts a flow.
The end events in Qflow can be end and terminate end, both end the flow execution.
A terminate end event ends the process execution even if there are still threads running. In this case, Qflow ends those threads and the flow ends its execution. An end event, on the other hand, waits for all threads to finish and once finished, the flow ends. The threads of the flow will be explained later in the section of gateway under Activity settings.
This tutorial does not use intermediate events, Therefore, if you want information about these, consult the manual of the Qflow Design.
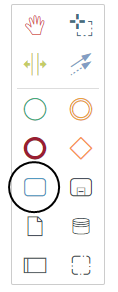
In order to add activities select the icon that represents an activity in the tool bar.
An activity represents a unit of work to be done in the flow. This can be a task, an automatic flow, or a subprocess.
Add the tasks and an exclusive gateway to determine where the complaint will be sent.
In order to connect all the activities select the connection tool (violet icon) in the tool bar and then click the activity that you want to connect.
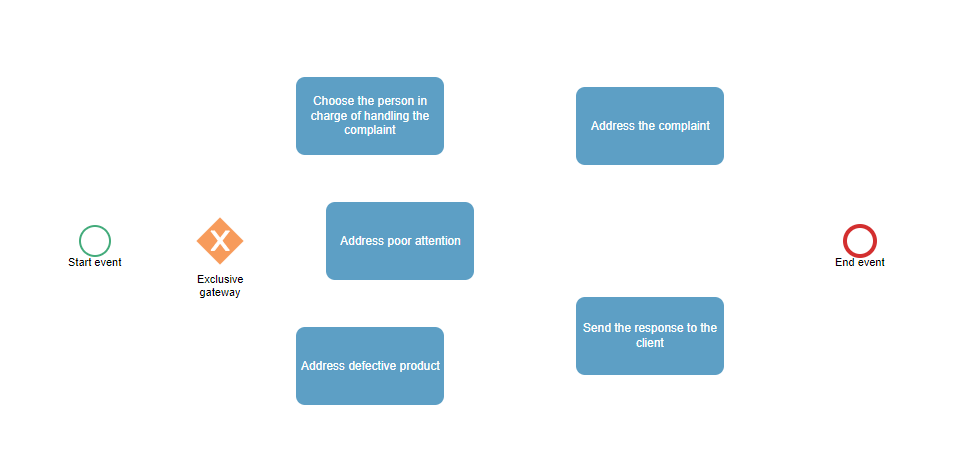
Assign types to activities. To specify the type select the task and then click the green icon with two arrows with inverse directions. There a menu will open where the activity type may be chosen. “Choose the person in charge of handling the complaint”, “Address poor attention”, “Address defective product” and “Address complaint” will be user tasks and “Send the response to the client” will be an email task.

Roles
Roles represent one or more users who will perform a certain role during the flow. When a flow template specifies that Qflow should send a user task, it does not specify a specific user, it specifies a role.
The option of assigning only one member, multiple, or members who have many users (for example, groups) is allowed.
In addition, it is allowed to apply rules that determine who the members of the role are, such as, “supervised by” another member, “supervisor of”, among others.
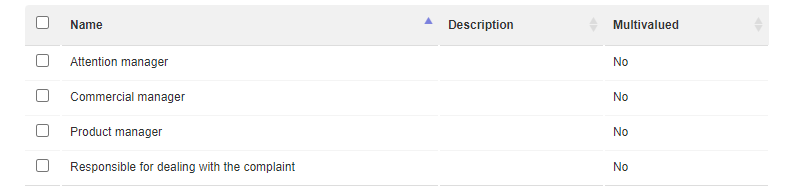
The flow needs four roles:
Commercial manager: the one who receives the task when it was determined that the complaint is another and is the one who chooses the person in charge of handling the complaint. A user can be assigned to this role during the process definition. This role is the receptor of the “Choose the person in charge of handling the complaint” task.
Complaint handler: the one who receives the “Address the complaint” task. A user is assigned to this role during the flow: it is what the commercial manager does. This role is the receptor of the “Address the complaint” task.
Attention manager: the one who receives the task when it is determined that the complaint is due to poor attention. Assign your user account as a member (this is just for testing: in a real case everyone would have a different member). This role is the receptor of the “Address poor attention” task.
Product manager: the one who receives the task when it is determined that the complaint is for a defective product. Assign your user account as a member (this is just for testing: in a real case everyone would have a different member). This role is the receptor of the “Address defective product” task.
Creation of the role of “Product Manager”:
Result of creating all roles:
Data domains
The domain of a datum specifies the set of values that the data can take and is associated with a data type. For example, if a datum should only store values corresponding to dates, the domain of that datum is a set of all possible dates. In Qflow, each application datum is associated with a domain and this is associated with a data type.
Qflow offers a set of basic domains, but it is possible to define additional domains.
The basic Qflow domains are the following:
Text area
Rich text area
Password
Money
Document
Email
Date
Date and time
Time
Hyperlink
Number
Telephone
Text
Boolean
A new domain is created in order to classify the complaint. It will be called “Complaint category” and it is assigned to the control type “combo box”, data type “text” and data source “list”.
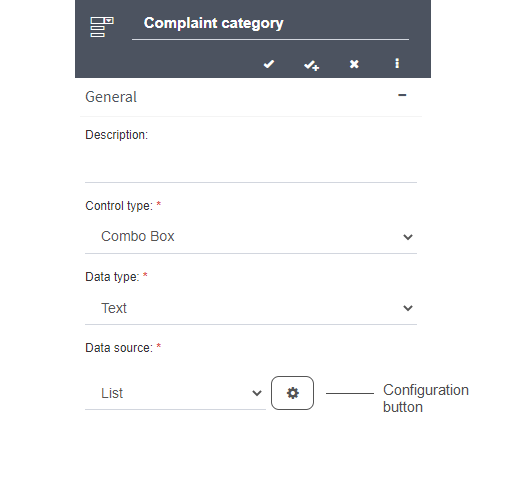
Then go to the list settings, which are accessed by clicking the button. Within the window you can add different options that will appear in the list, they are added with the “+” button.

Application data
The application data is data that Qflow handles in the flows. Each datum is associated with a domain which is in turn associated with a data type and a control type that determines how the data will be displayed in the flow forms.
The properties form of an application datum has the following sections.
General: it contains the name, description, domain and other options that define the data behavior.
Presentation: it contains properties that define aspects of how the data will look on Qflow Task.
Advanced (appears when the form is expanded): it allows you to define default values for the data.
Dependencies (appears if the data domain has parameters): it allows you to define what application data is used to provide values to the domain parameters.
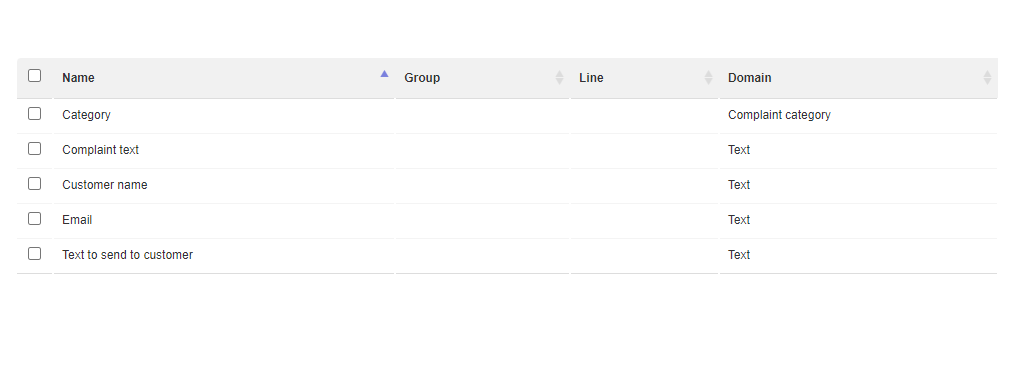
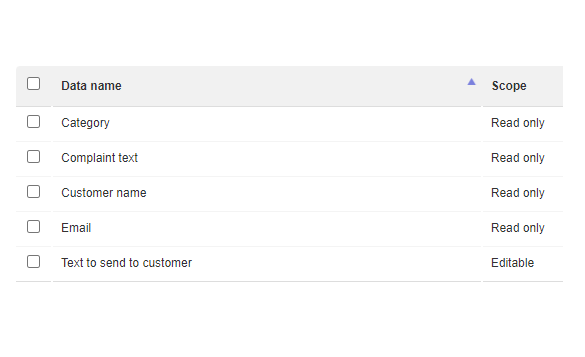
The application data that are needed fot this tutorial are:
Customer name
Customer email
Complaint text
Text to send to the client
Category
Each application datum will be created with the “+” button where a window will open in order to create it. For each one specify their respective domain.
Creation of the application data “Customer name”:
Result of creating all application data:
Activity settings
To define each activity you must click on each of them and then click on the blue gear button (“Edit”) or double click on these and a window will open to specify the properties.
Exclusive gateway
The gateways allow modifying the directions of a flow, either by creating several parallel paths in the process or by selecting one of several possible paths after the gateway.
All gateways are connected to various elements through their connectors. What changes depending on the type of gateways is whether, once a flow passes through it, it continues to use all the paths, some of them or only one.
There are different types of gateways:
Exclusive gateway: it selects one of several possible paths for the process to continue running.
Inclusive gateway: it selects one or more of several possible paths for the process to continue running, so that it can spawn multiple parallel threads.
Parallel gateway: it generates as many parallel paths as there are outgoing connections.
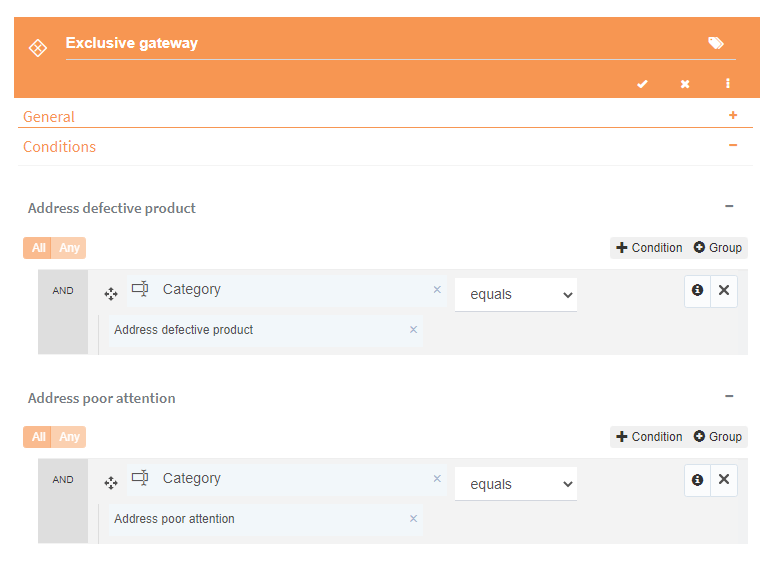
An exclusive gateway gateway was created in this tutorial. To assign its properties, access its configuration window.
The “Conditions” section is divided in three subsections, each one referencing the tasks that are connected with the gateway.
In the subsection that references “Address defective product” click on the “+Condition” button. This will add an empty condition. Where it says “Start typing”, type “Category” and when the application data “Category” appears select it.
In the text box positioned below “Category” type “Defective product”.
Do the same thing in the subsection that references “Address poor attention”, but instead of typing “Defective product” type “Poor attention” in the condition.
Finally, there is the possibility of a default connection, which is the one that an exclusive gateway uses when none of the conditions is evaluated as true.
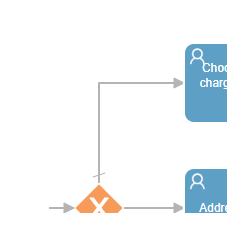
To define a default connection, in the flow template click on the connection that joins the gateway to the “Choose the person in charge of handling the complaint” task then click the green button with two white arrows and select “default connection”. This way, if none of the other expressions are valid, this connection will be used.
The arrow that connects the activities will look like this:
“Choose the person in charge of handling the complaint” task
As it is a user task, a message, addressees, responses and the data scope will be defined.
In the message type, “Choose a complaint manager for ” and then (followed by a space) the customer’s name. This is added with a tag, which is defined by a “#” and adding the application data “Customer name”.
Then, you have to select the person whom the task is addressed to. The addressee is the role to which the task will be assigned (through the role, the task is assigned to users: the members of the role). In this case, the receptor is the “Commercial manager” role.
Below the message, the possible response to the task must be added. When a user is assigned to a task, they must enter Qflow Task to answer it. Some tasks provide several possible answers. In this case, only one response is needed which indicates that the complaint manager was selected and that the flow may continue. The response will be added with the “+” button.

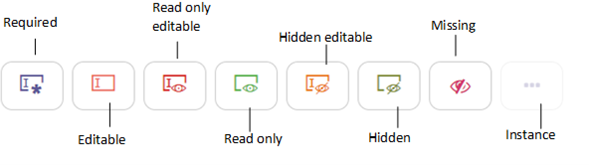
Finally, the scope must be determined. Qflow allows you to define which application data, template roles and attached files users can see or modify during the flow and where they can do it. The same goes for comments, but in this case existing ones can be added or viewed.
The scope of data and roles behave in the same way.
The scope of the application data is modified by a table that shows the list of application data. All application data will be displayed if all of them have the “Missing” scope, the option “Show missing scope data” will be automatically checked. Otherwise the data with a scope other than “Missing” will be displayed.
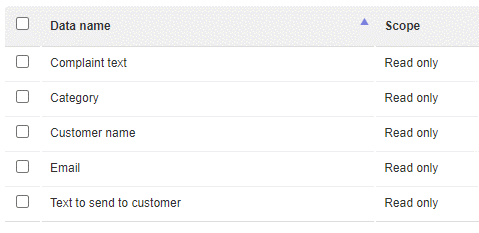
In this case, the scope must be modified so that the “Complaint handler” role is modifiable and required. In addition, the user performing this task should see the complaint data, so in the data scope it must be specified that the application data is visible but not modifiable (“Read-only” scope).
The data scope is like this:
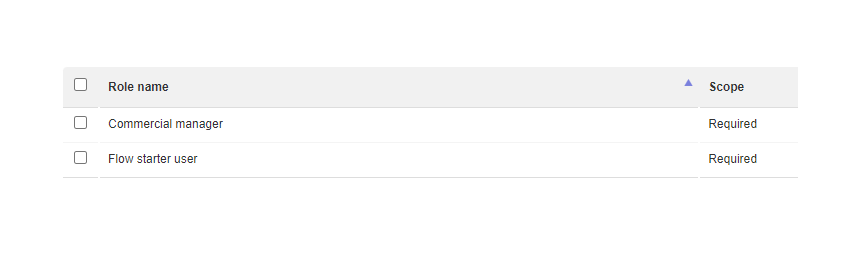
The scope of roles is as follows:
To change it, select the data you want to modify and select the scope you want to configure.
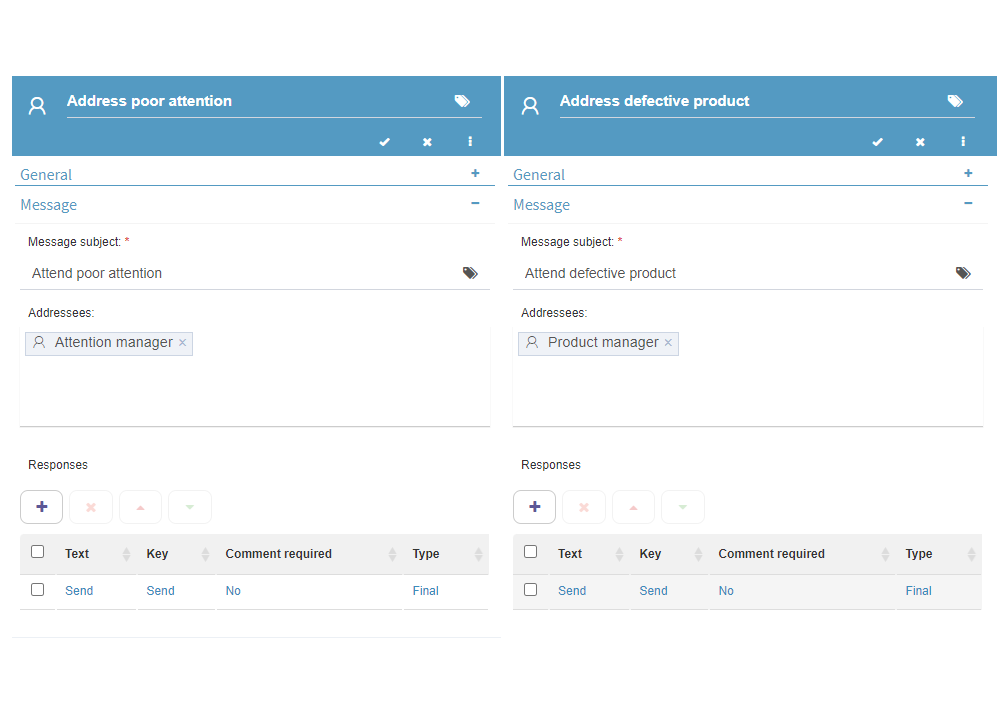
“Address poor attention” and “Address defective product” task
These two are user tasks, therefore their properties will be defined in a similar way as the previous one. Assign their correct addressee and in this case the application data does not need to be visible, except for the “Text to send to the customer” which must be editable so that the person in charge of handling the complaint can edit the comment.
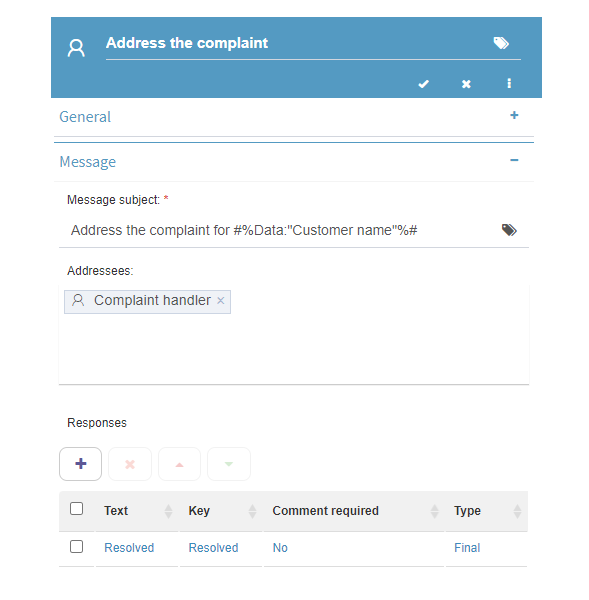
“Address complaint” task
In the message subject type “Address complaint and type text to send to customer” and then use the application data “Customer name” as a task, just as in the other user task.
The addressee will be the “Complaint handler” role, which so far does not have any members, but when the process is running, it will have the user selected by the commercial manager in the previous task as a member.
Then add a final answer, so that the user may answer the form, for example, “Resolved”.
In this task none of the roles have to be visible or modifiable but the application data must be “readonly”, except “Text to send to the customer” which must be editable so that the complaint handler can edit the comment.
The task looks like this:
The scope of the task looks like this:
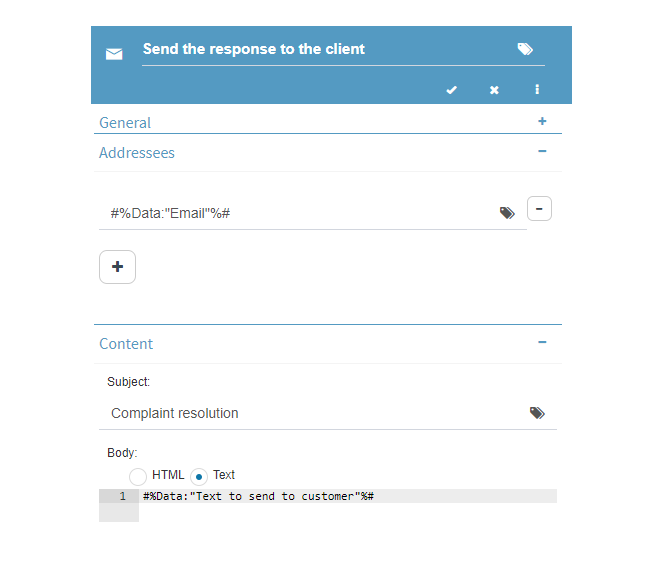
“Send the answer to the customer” task
This is an email task. Therefore, its properties configuration will be different from the previous ones.
The addressee must be the “email” application data, it is specified with a tag like the customer name in the previous user task. Then in the content subject that the customer will receive type, “resolution of your complaint”.
Afterwards it is necessary to specify that the body of the message must be entered in the data “Text to send to the client” by the person in charge of resolving the complaint. It is specified by a tag , but in this case, to open the list of items that can be used as tags, you need to click in the text area and press Control + Space. This is how properties that use a text area work (for example, the code in a code task).
The tasks can be of mail, user, service, script, user notification, async service, formula or call type depending on what you want to do in that step.
Code task: it allows you to write code for a flow to run. The code can be written in C # or Visual Basic .NET languages and must implement an interface defined in Qflow.
Mail task: it sends an email message to the addresses specified in its properties.
Formula task: it takes application data or template roles, it performs operations on them and it generates a result that is also stored in some application data or template role.
User notification task: it sends a notification to Qflow users.
Service task: it runs an integration
Async service task: it allows you to assign a job to a bot. A bot can have parameters, just like an integration. An async service task is very similar to a service task, with the only difference that instead of selecting an integration to run, you select a bot that is assigned to a job.
User task: it assigns a task to a user or set of users. Task recipients are specified by the template roles of the flow.
End the flow execution
Once all the activities have been configured with their respective roles and application data, the process must be saved, this is done by checking in the template.
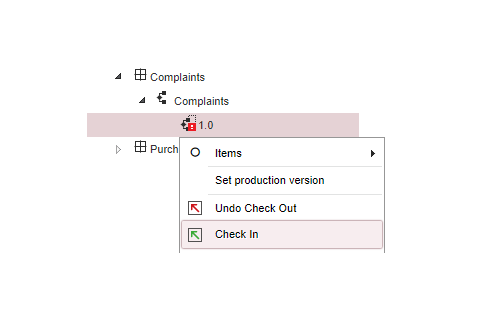
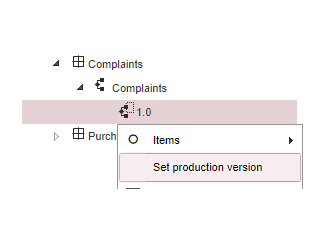
Finally, the version must be set into production, so that when you enter Qflow Task to start your process, you will find the template you just designed. To set it into production, find the version in the package tree, right-click on it and select “Set production version” from the menu.
The final design of the flow is as follows, for more information about items and elements of the flow that was not detailed in this tutorial, you can see the manual of Qflow Design.