Manage the team
Introduction
This tutorial briefly explains the features of Qflow Team. This site is used to represent the structure of the organization and its members in the system.
The elements that comprise the organizational model are nodes, groups and users. In the next section, how each element is created will be explained, along with the permissions that can be given to users within each of the elements and how users can participate within work queues.
Node structure
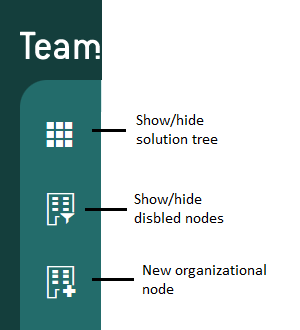
The side menu of the site shows three buttons with which you can show/hide the solution tree and operate with the organizational nodes of the tree (Show disabled nodes and Create a new organizational node).
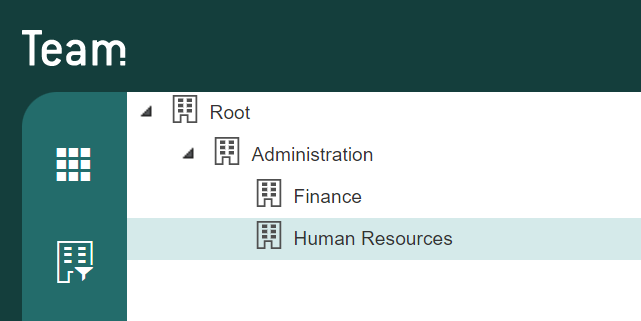
Within each organizational node you can see the hierarchical structure of the organizational model and select the element on which you want to operate.
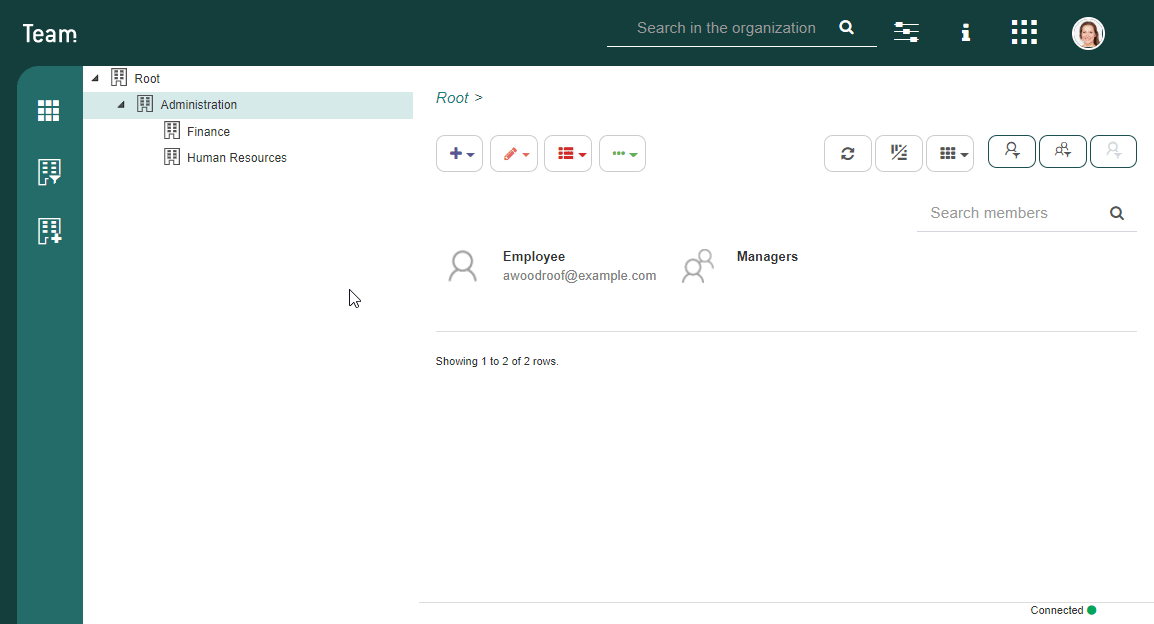
There is a node that is the root of the structure. It has child nodes and can appear open, showing its children, or closed. To open a node you must click the triangle that is on the left.
In this example, an “Administration” node was created with two subnodes (children) “Finance” and “Human Resources.”
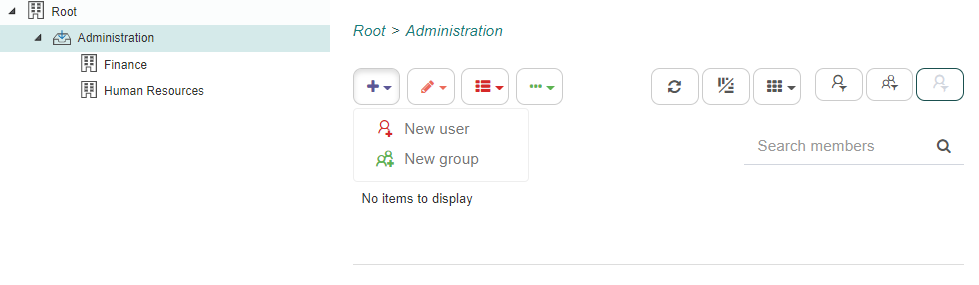
To be able to see the groups and users that the nodes have, you have to double click on them.
Groups:
Users who share certain properties can be grouped.
They may contain other groups.
Users:
They represent Qflow users.
They can be a member of several groups.
They can only be on a unique node.
By clicking these different buttons you can create the users or groups of the node:
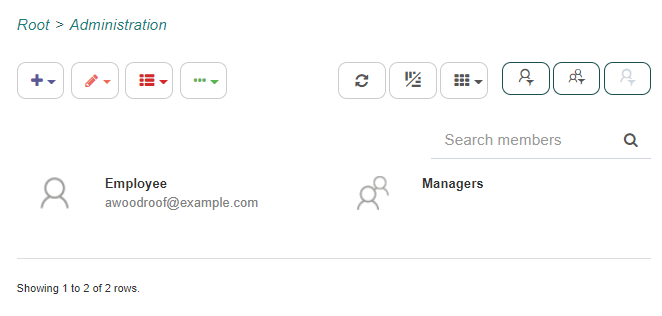
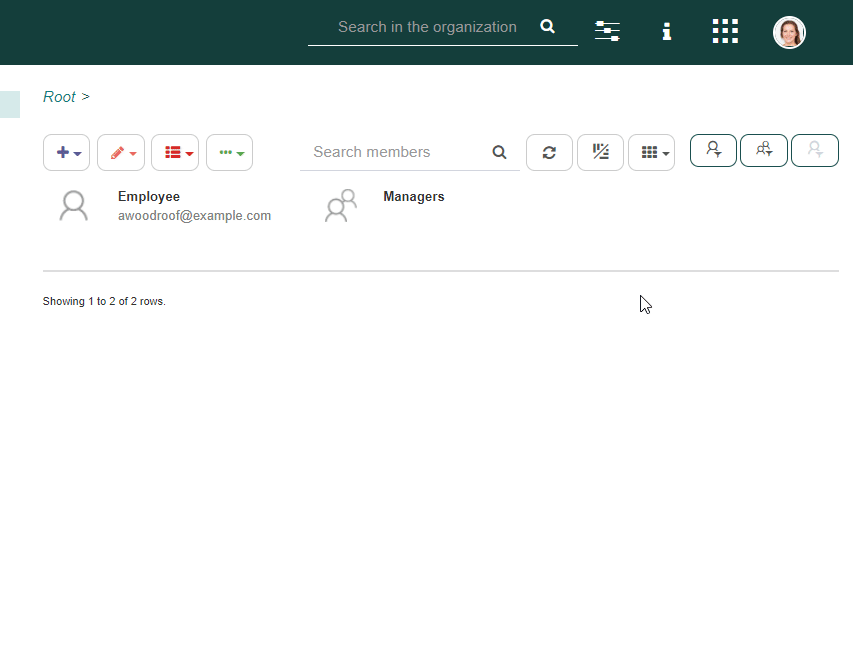
In this tutorial a user “Employee” and a group of “Managers” are created. Once the users and groups have been created, the window will look as follows:
Work queues
Another property of nodes is that they can behave like work queues. Work queues can be chosen as task recipients. When a task is assigned to a node that behaves as a work queue, any user who has permission to actuate on that queue can reply to the task.
Configure a work queue
Within the node properties in the “Advanced” section, the “Behaves as a work queue” option must be checked.
After the option is enabled, the configuration button will be available. This button allows you to configure the permissions and the validity of the work queue. When that button is clicked, the work queue’s properties appear.
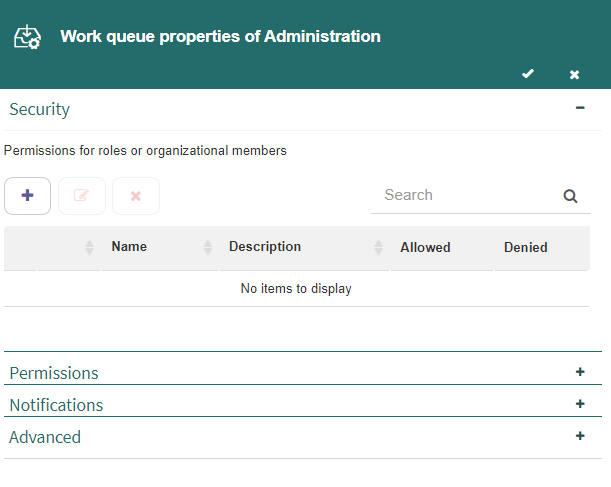
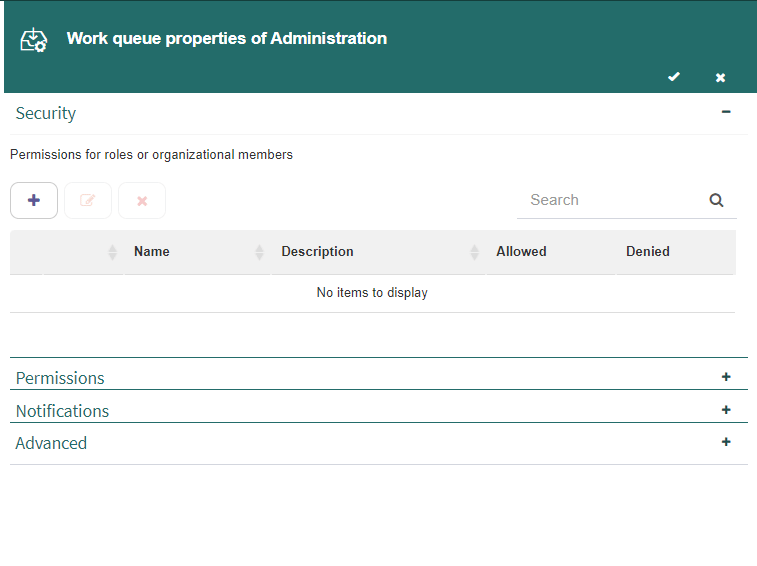
The “Security” section of a work queue’s properties form allows you to define its permissions. By clicking on the “+” button you can add the groups and/or users that will participate in the queue.
To add them, start typing the name and a list with the available users and/or groups will be displayed.
Once it is selected, a table is displayed to configure the permissions.
You must select “Allowed” or “Denied” next to each permission as shown in the image below. If you check the “Inheritable” option, the permission will be applied recursively.
This means that the selected user, role or group will have permission on the node that is being edited and also on all of that node’s descendant nodes. For example, for a manager to have permissions to “View” the tasks for an entire branch of the organization’s work queues, they can have “View” permissions on the root node of that branch and select the “Inheritable” option.
The possible permissions are:
Visualize: it allows you to access the work queue inbox.
Actuate: it allows you to answer a task in the work queue.
Sign: this permission is not useful in Qflow, but it is used in Q-expeditive, which is built on the basis of Qflow. It allows you to sign.
Within the “Permissions” section you can view the permissions of the users on the work queue: if the user can visualize, actuate and/or sign.
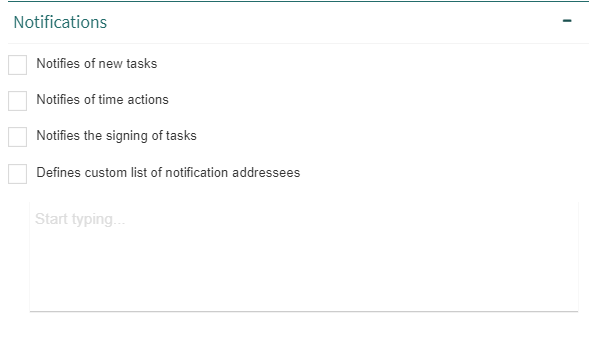
Within the “Notifications” section, it is possible to specify the sending of notifications when an event related to the queue occurs. To specify the events that should trigger notifications, check the options you want from the following:
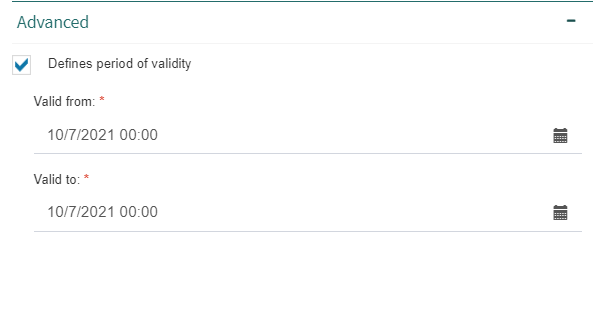
In the “Advanced” section you can define the validity of the queue. To define a validity period, check the “Defines period of validity” option and select the period’s start date (“Valid from”) and end date (“Valid to”). The node will only behave as a work queue during that period.
The icon of the node in the tree changes once it is defined as a work queue
Manage tool permissions
Within “Settings” in the site’s upper menu, in the “Manage tool settings” option, you can configure different permissions.
For each one, the panel shows which role the permission is for, the role description, a list of allowed actions, and a list of denied actions. The list can be filtered in the usual way and can also be modified by adding, removing and modifying elements.
There are three types of permissions defined:
Access tool
Manage configuration
Manage security
To add a permission to the “Employee” user previously created:
Click the “Add” button. That makes Qflow show a role finder.
Select the permission’s recipient. To do this, write part of the user’s name, in this case “Employee” in the search engine (where it says “Start typing …”) and when you see it in the list that appears, select it.
When a permission’s recipient is selected, Qflow displays a form to select the actions that are included in the new permission.
For each of the permissions shown on that form, check whether it is allowed or denied.
Finally, if you want more information that was not detailed in the tutorial, you can see the Qflow Team manual.