Slack
Introduction
The purpose of this manual is to detail how to configure and integrate Qflow with Slack to allow interaction between both platforms, allowing to send and respond to Slack messages from Qflow.
Slack has the following actions:
Prerequisites
It is necessary to have a Slack account and a workspace created on the platform. This can be done from here.
Application parameter
To establish the connection, it is necessary to have at least one application parameter (see Application Parameters) that allows establishing communication between Qflow and Slack. This parameter can be created from the service task configuration in Qflow. (see Connector Configuration from a Service Task)
To create a Slack application parameter, the following steps are required as detailed below. To establish a connection, it will only be necessary to configure one of them.
Application parameter using OAuth Authentication Token
This type of application parameter requires the following parameter:
OAuth Authentication Token: It is an authentication token that allows Qflow to connect to Slack as a Bot, simulating being a user and performing operations on behalf of the application.
To obtain it, the following steps must be followed:
Access the Slack apps section. Here, create a new application by selecting Create New App.

Fig. 795 Create New App button in the Slack applications section
Select From scratch to specify that the application is being created from scratch.
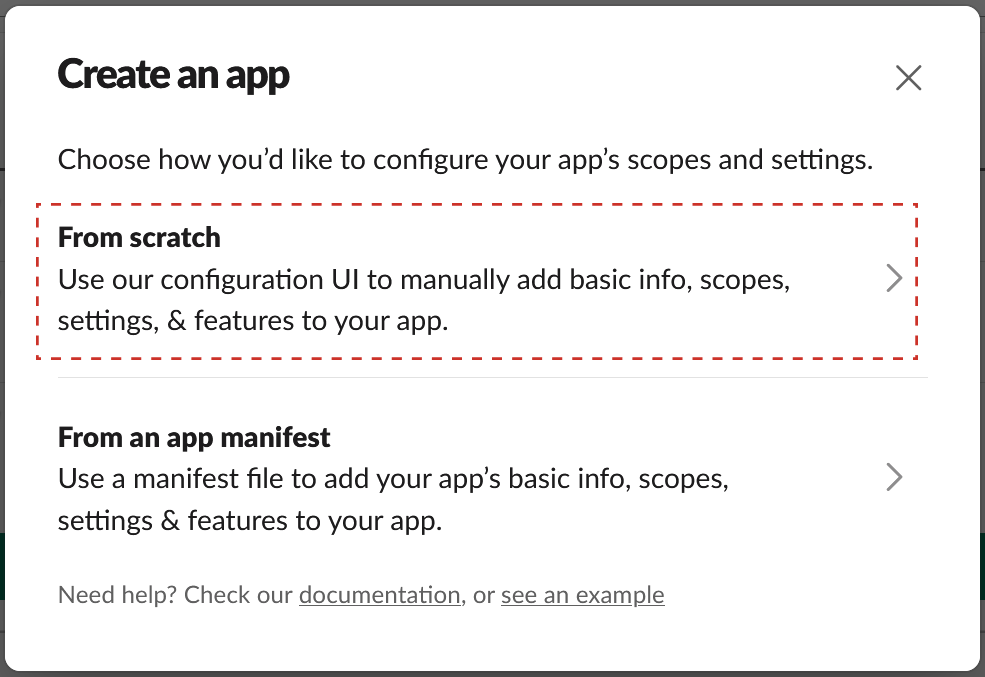
Fig. 796 Application creation type selection view in Slack
Enter the application name and select the workspace to which it will belong, then select Create App. In the example in the image below, it shows that the application is called Qflow and belongs to the Company name workspace.
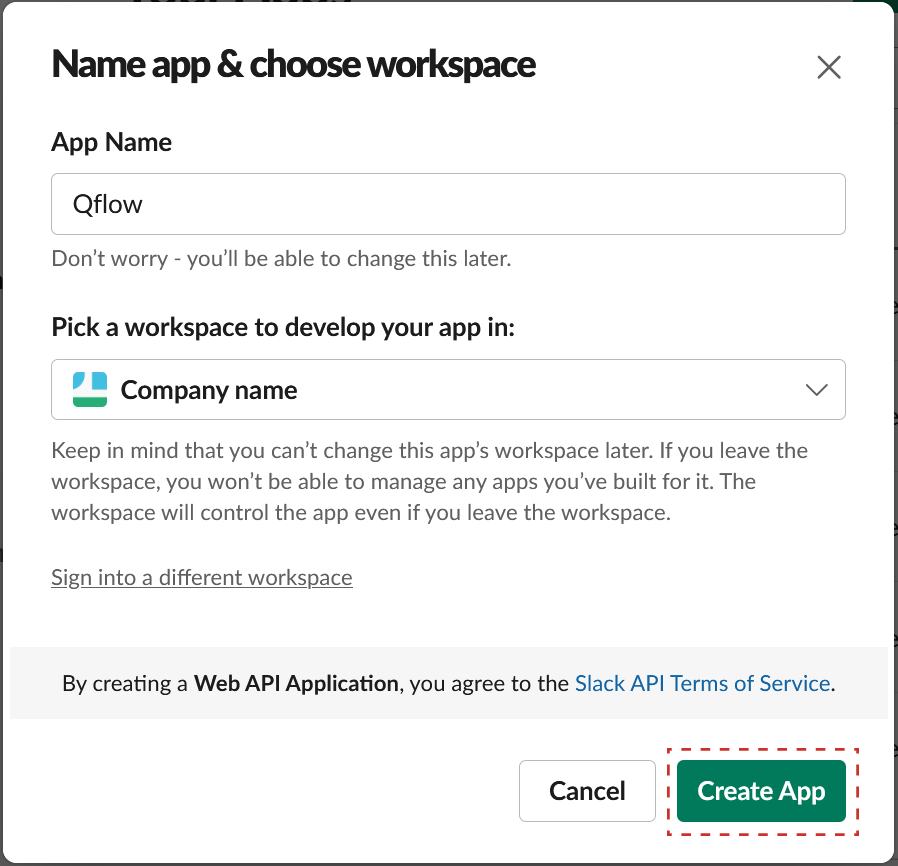
Fig. 797 Application creation view in Slack
Select the OAuth & Permissions option in the left menu.
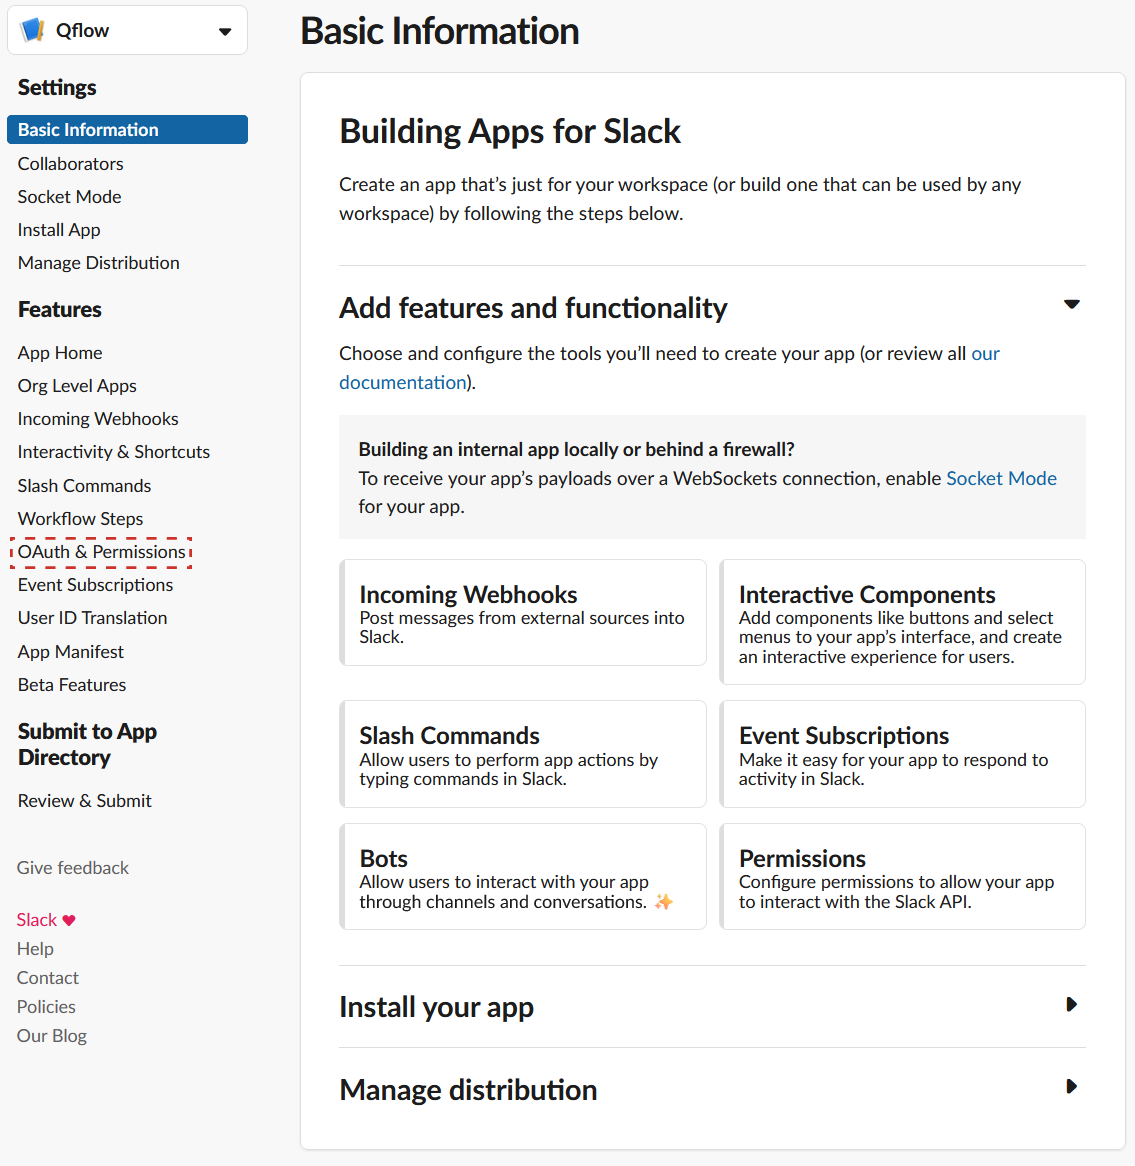
Fig. 798 OAuth & Permissions selected in the Slack application menu
Within OAuth & Permissions, in the Scopes section, select the Add an OAuth Scope option to add a permission to the application.
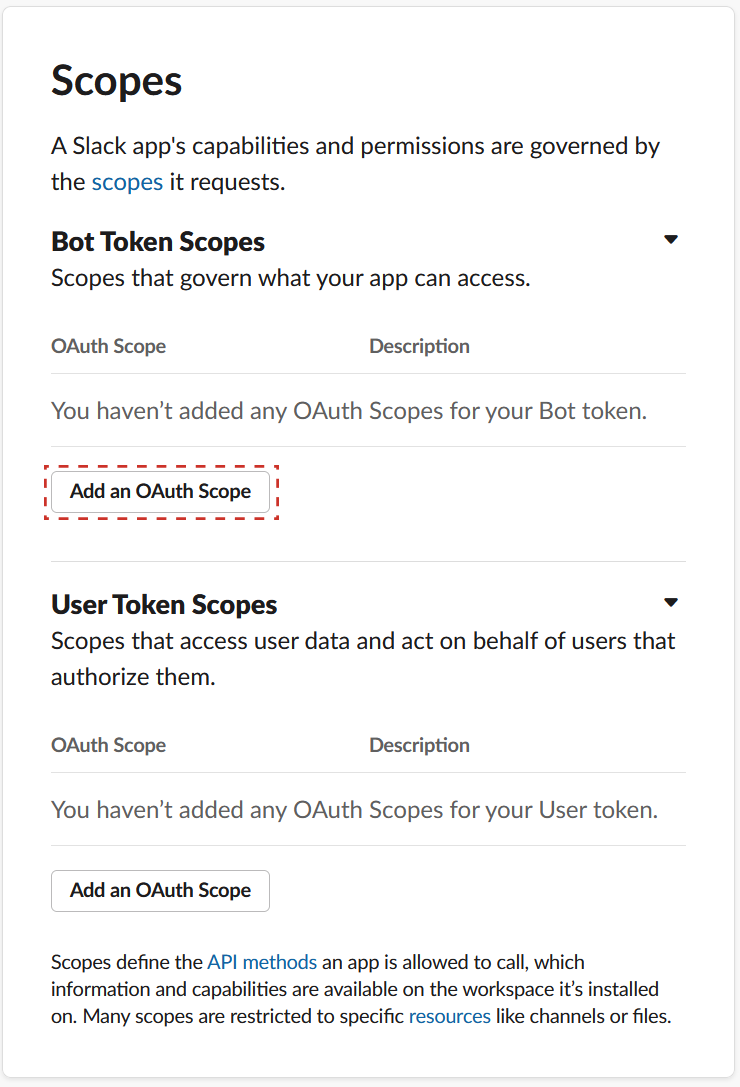
Fig. 799 Add an OAuth Scope selected in the Slack application permissions
Add the channels:read and chat:write permissions, which allow reading basic channel information and writing messages in them, respectively.
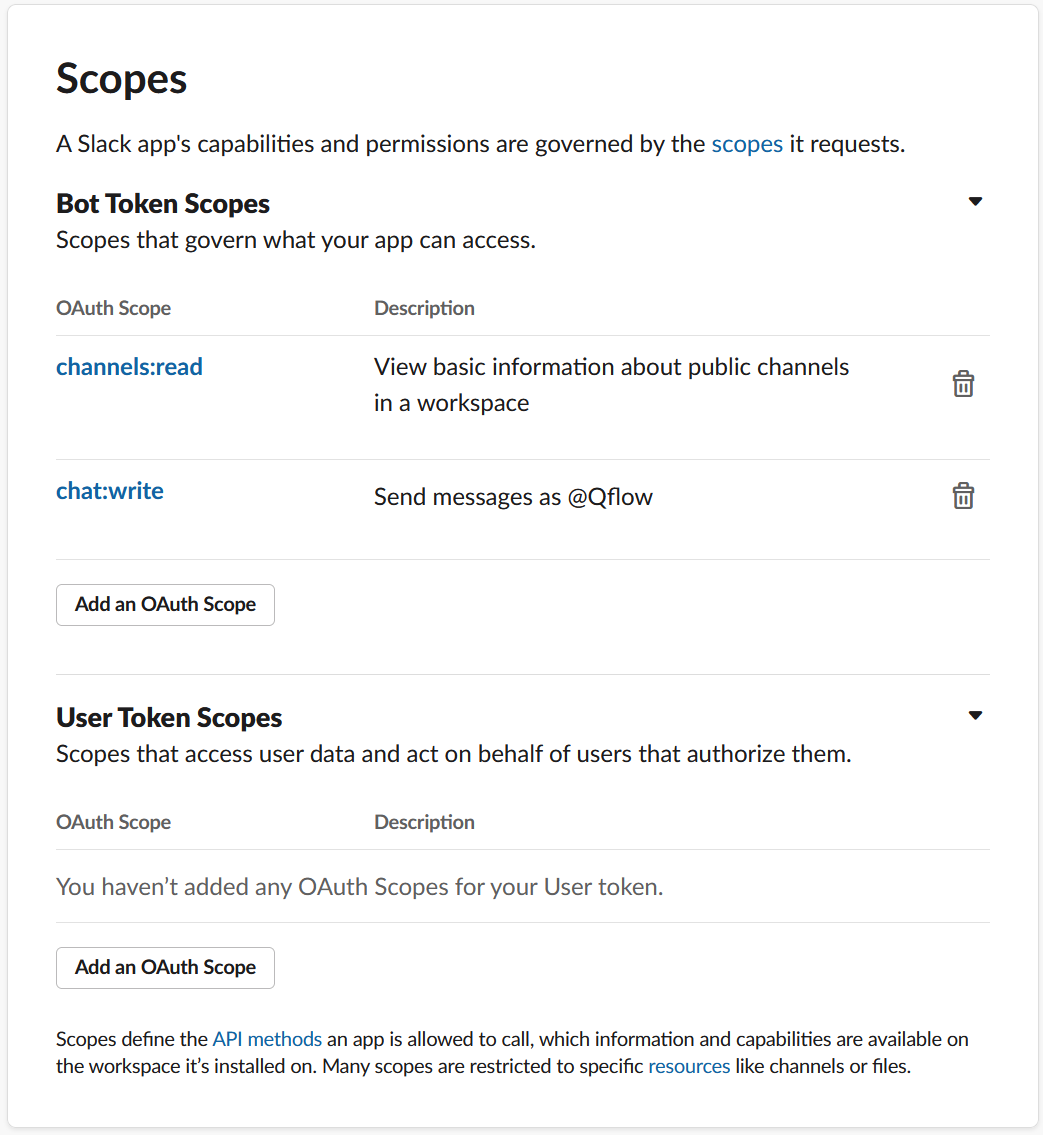
Fig. 800 channels:read and chat:write permissions added to the Slack application
Within OAuth & Permissions, in the OAuth Tokens for Your Workspace section, select Install to Workspace
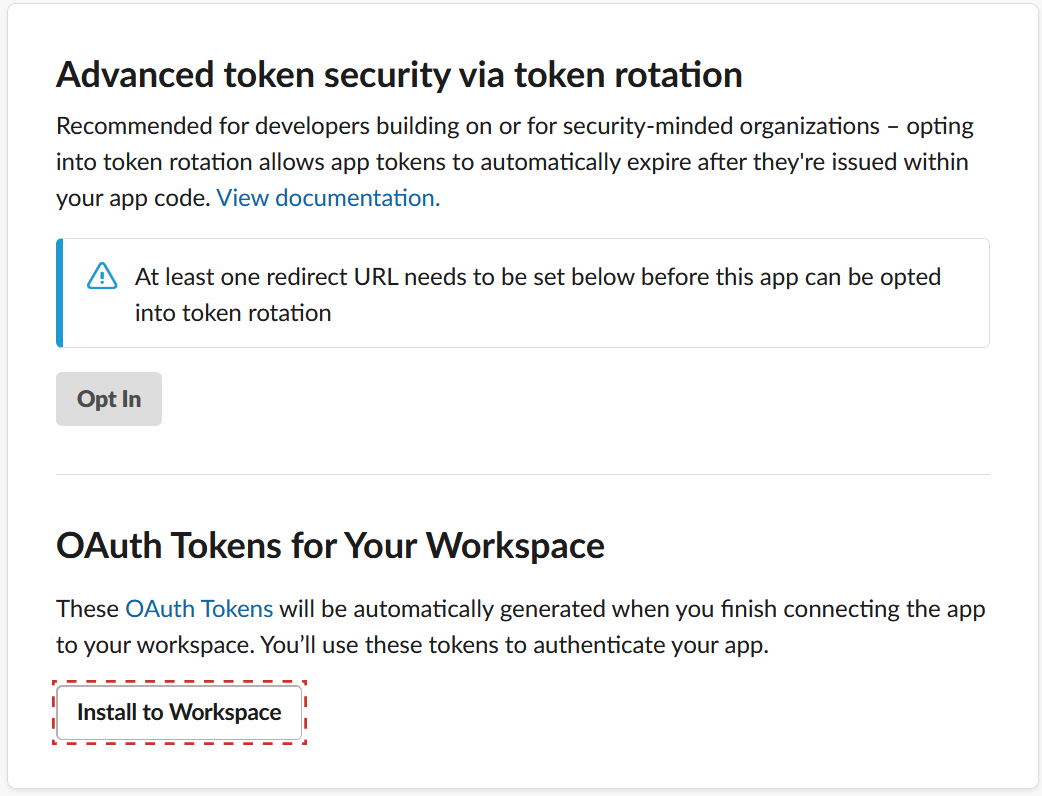
Fig. 801 Install to Workspace selected in the Slack application authentication
Confirm the installation of the application in the workspace.

Fig. 802 Allow selected in the Slack application access permissions confirmation
Once the permissions are confirmed, Slack displays the Bot User OAuth Token, which is the authentication token required to configure the application parameter in Qflow. With this, the necessary steps on the Slack API page are completed.
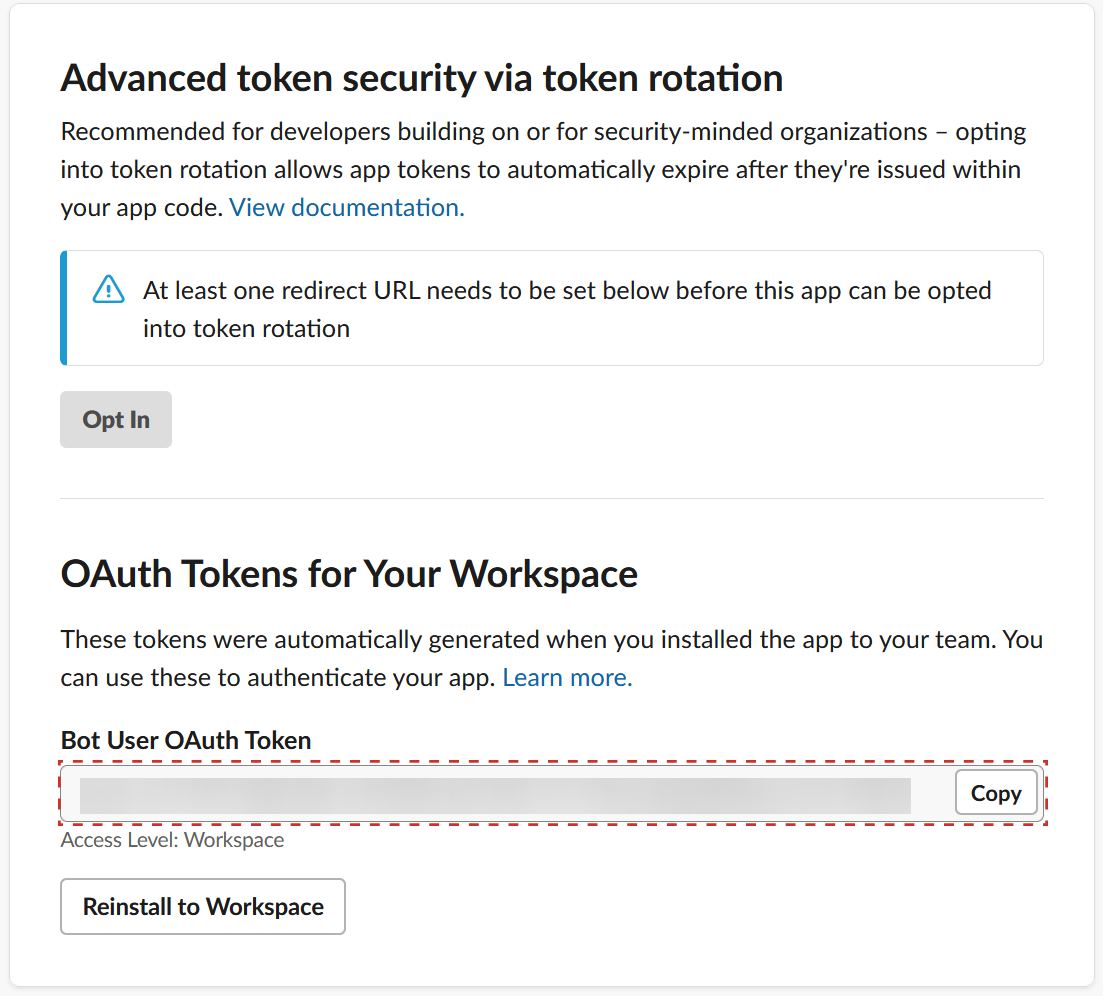
Fig. 803 Bot User OAuth Token selected in the Slack application authentication
In Qflow Design, add the Bot User OAuth Token to the OAuth Authentication Token parameter
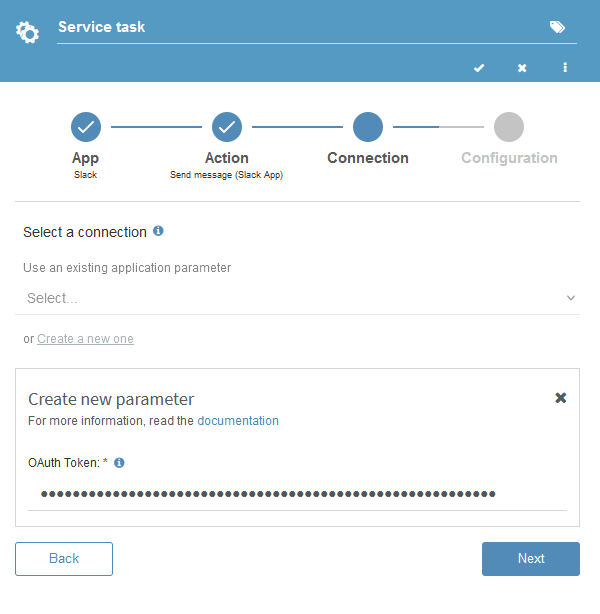
Fig. 804 OAuth Token added in Qflow
From the Slack chat, it is necessary to add the application to each Slack channel where you want to allow message sending. You must select the Add apps to this channel option in the desired channel.
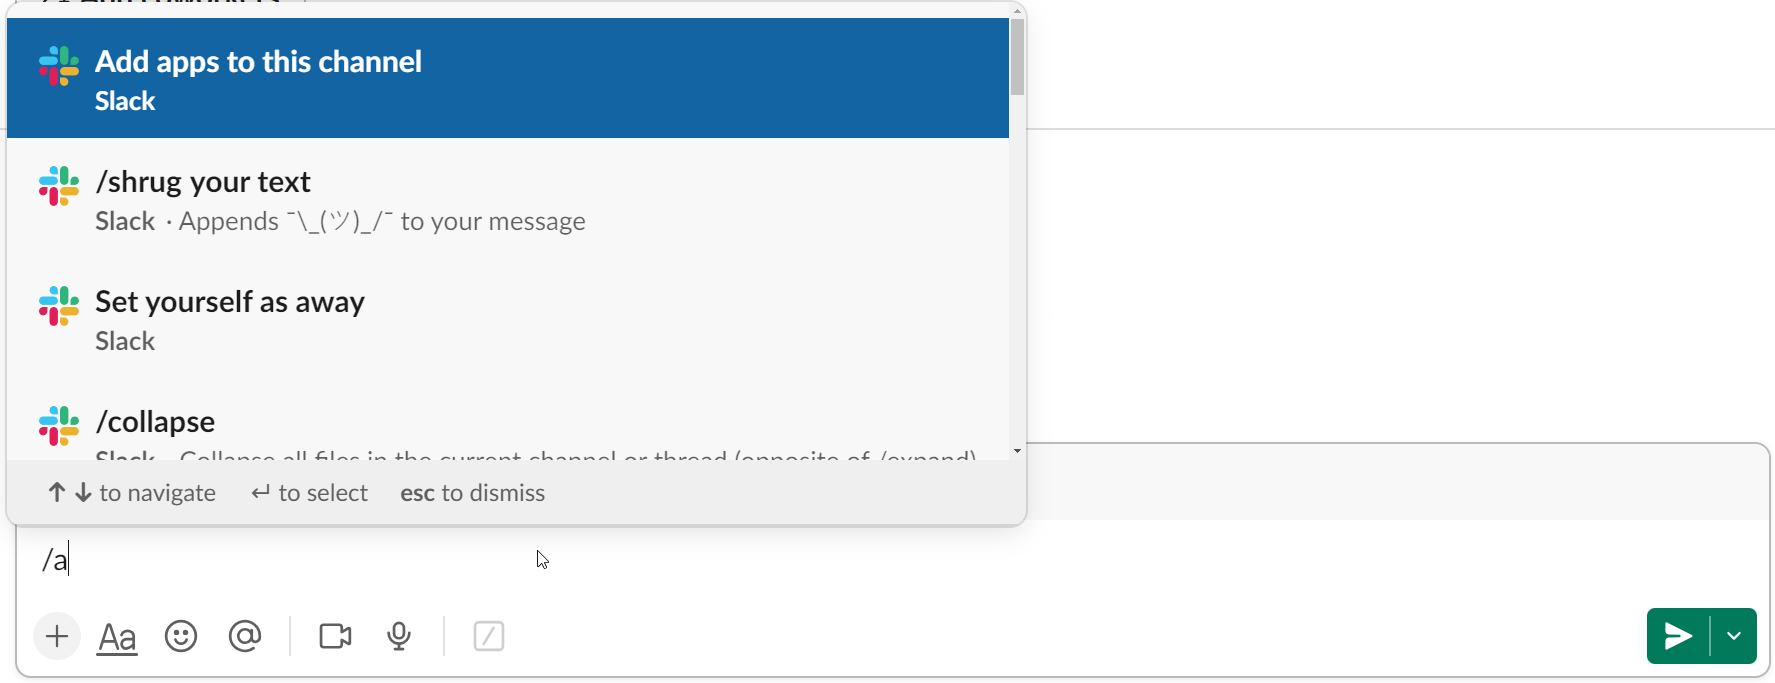
Fig. 805 Add apps to this channel selected as an action in the Slack chat
Search for the Qflow application and add it to the selected channel. To do this, select Add.
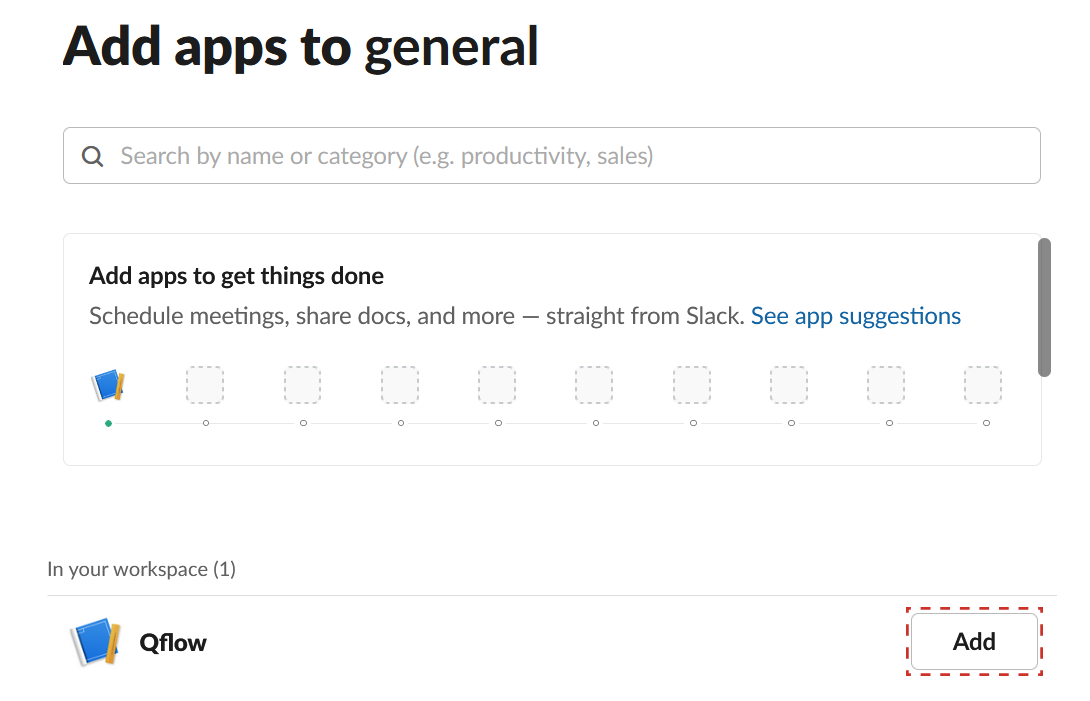
Fig. 806 Add selected in the window to add applications to a Slack channel
Once the steps are completed, it will be possible to send messages from Qflow to Slack using Slack App.
Application parameter using Webhook
This type of application parameter requires the following parameter:
Webhook Link: A link that represents a Slack communication channel, allowing Qflow to send messages within this channel.
To obtain it, the following steps must be followed:
Perform steps 1 to 3 of the previous section. (see Application parameter using OAuth Authentication Token)
Select the Incoming Webhooks option.
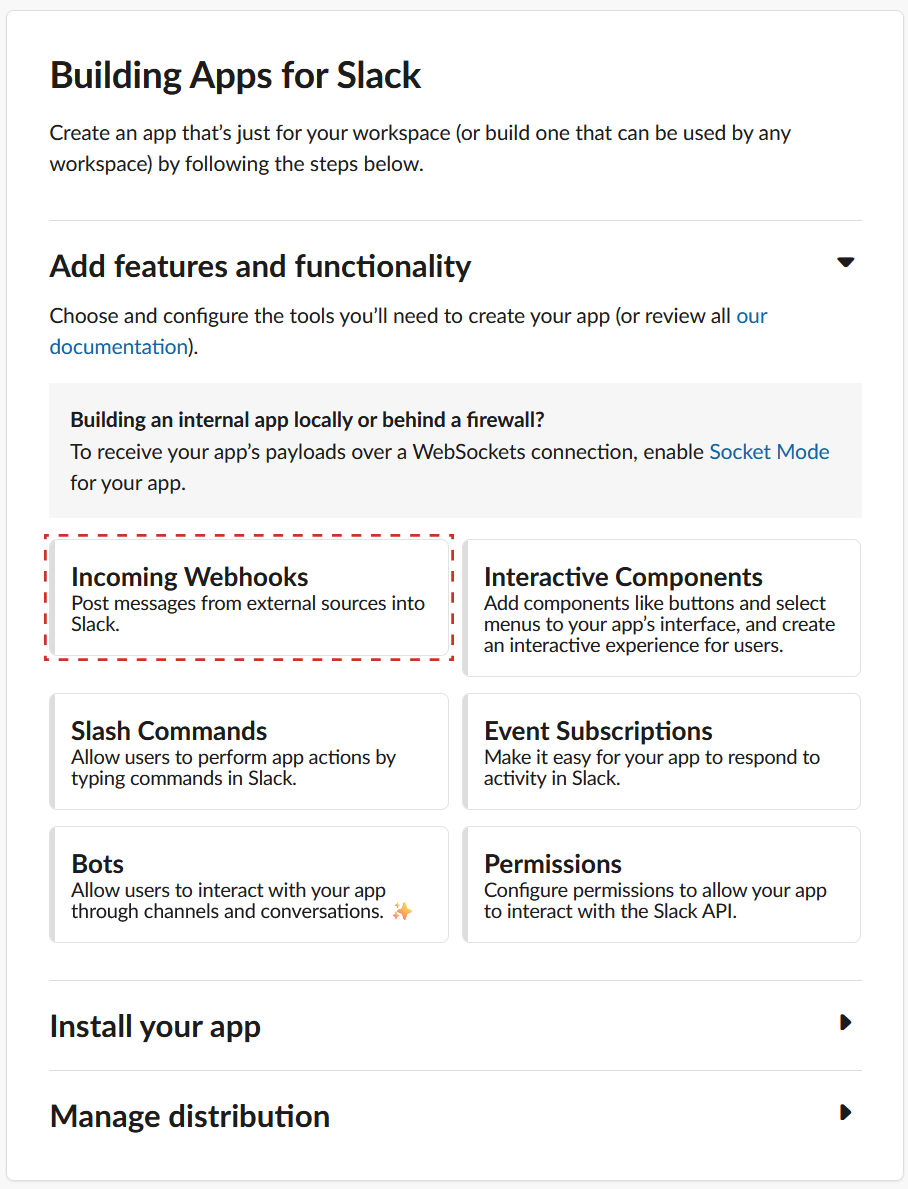
Fig. 807 Incoming Webhooks selected in the Slack application add features and functionality menu
Activate the Incoming Webhooks to be able to use them.
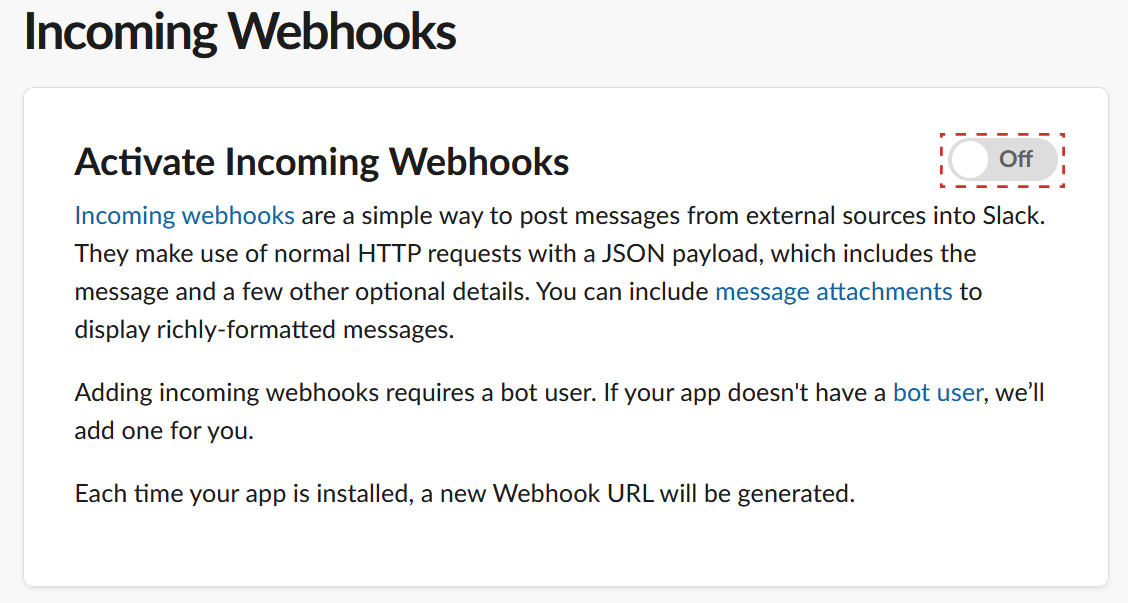
Fig. 808 Activate Incoming Webhooks selected to activate the Webhooks functionality in the Slack application
Once the Incoming Webhooks are activated, select the Add New Webhook to Workspace option. Each webhook created will be associated with a specific Slack channel.
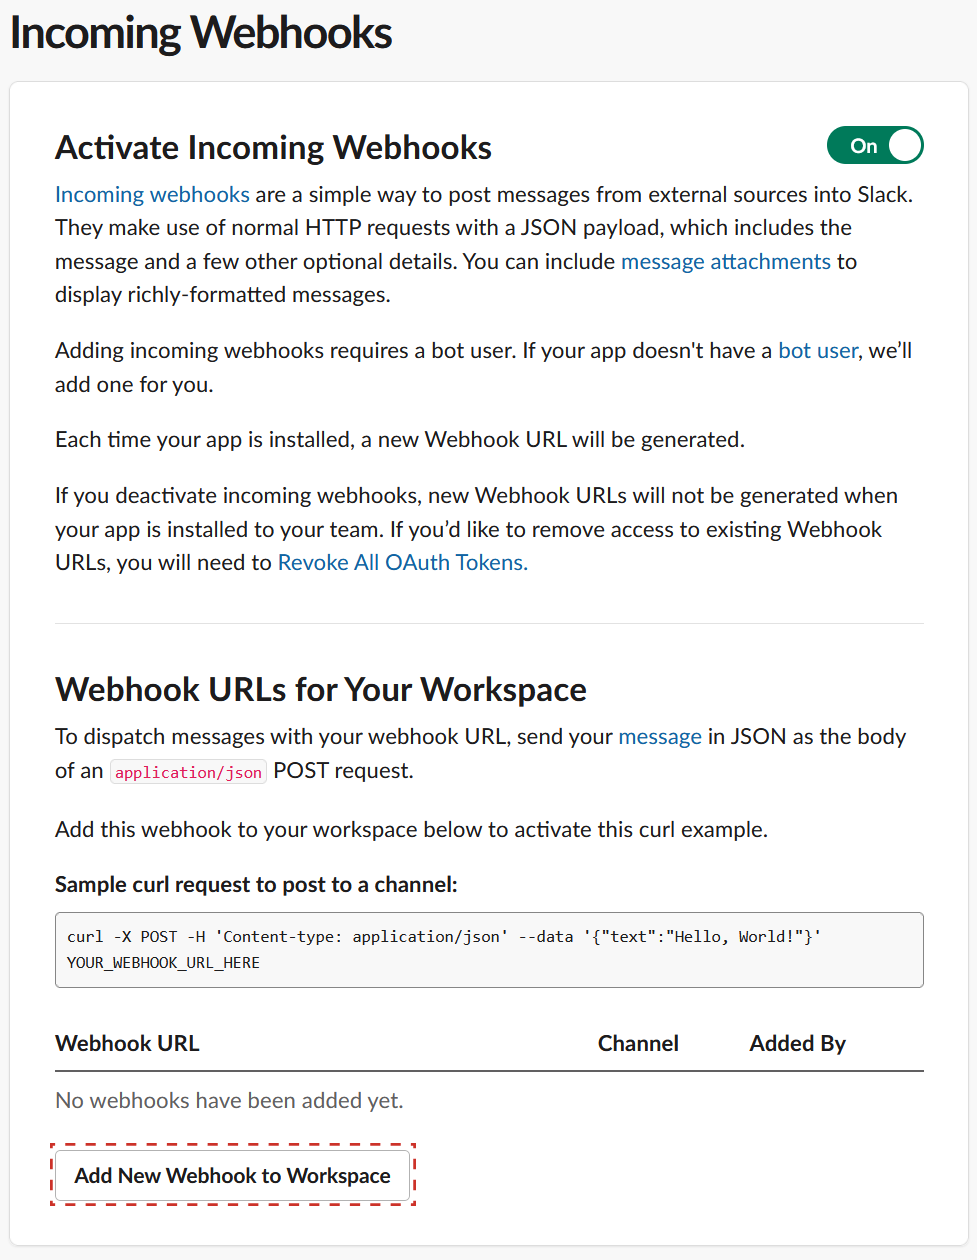
Fig. 809 Add New Webhook to Workspace selected in the Incoming Webhooks view of the Slack application
Select the channel to associate the webhook with and then select Allow.
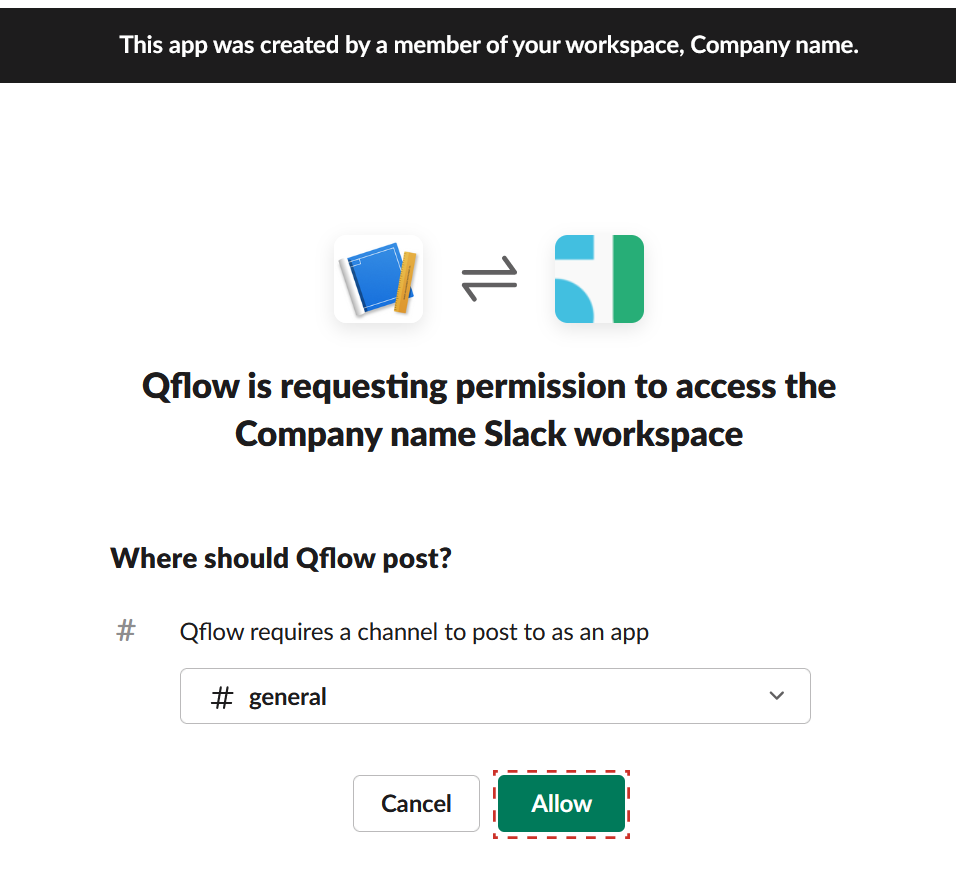
Fig. 810 Allow selected in the channel selection view to associate a webhook in the Slack application
Slack will display the Webhook URL of the webhook created for the selected channel, necessary to configure the application parameter in Qflow. With this, the necessary steps on the Slack API page are completed.

Fig. 811 Webhook URL displayed in the webhook creation view in the Slack application
In Qflow Design, add the Webhook URL to the Webhook Link parameter

Fig. 812 Webhook Link added in Qflow
Once the steps are completed, it will be possible to send messages from Qflow to Slack using Webhook.
Actions
The following actions can be performed with Slack:
Send message (Slack App)
This action allows sending a message directly to a Slack channel. The channel name (without the ‘#’) must be provided, followed by the message. If you want to respond to another message, you can also add its identifier. After sending the message, a number is received that identifies the message, allowing to respond to it later.
Input |
Description |
|---|---|
Channel name |
Required. The name of the Slack channel to which the message is to be sent. (Without ‘#’ at the beginning) |
Message |
Required. Text of the message to be sent by Slack. |
The identifier of the message to which you want to respond. |
It is obtained when creating a message from Qflow. If you do not want to respond to a message, this parameter can be left blank. |
Output |
Description |
|---|---|
Message ID |
The number that identifies the message that has just been sent. This number can be used to respond to this message. |
Send message (Webhook)
This option allows sending messages to a Slack channel, but in a more limited way. The channel to which you send the message is determined by the Webhook used, as each Webhook is associated with a specific channel. It is not possible to respond to messages directly with this option, as the identifier of the message to which you want to respond cannot be specified.
Input |
Description |
|---|---|
Message |
Required. Text of the message to be sent by Slack. |