Google Calendar
Introduction
The purpose of this manual is to detail how to configure and integrate Qflow with Google Calendar to allow interaction between both platforms, allowing you to create, update and delete Google Calendar events from Qflow.
Google calendar has the following actions:
See Actions to know the description and content of each one.
Prerequisites
It is necessary to have a Google account and a workspace created on the Google platform. This can be done here.
In addition, it is necessary to have a Google Workspace account and have Domain Delegation enabled. This can be enabled on your Google Admin Console.
Application parameter
To establish the connection, it is necessary to have at least one application parameter (see Application Parameters) that allows establishing communication between Qflow and Google Calendar. This parameter can be created from the service task configuration in Qflow. (see Connector Configuration from a Service Task)
To create a Google Calendar application parameter, the following steps are required as detailed below.
Application parameter using Domain Wide Delegation
This type of application parameter requires the following parameter:
User email
Project ID
Private key ID
Private key
Client email
Client ID
To obtain them, the following steps must be followed:
Access the Google Resource Manager. Here we will create a new project by selecting Create Project.

Fig. 846 CREATE PROJECT button in Google Cloud resource manager
Type the name of the project and select the Location to which it will belong, then select CREATE. The example in the image below shows that the application is called QflowTestWiki and does not belong to any organization.
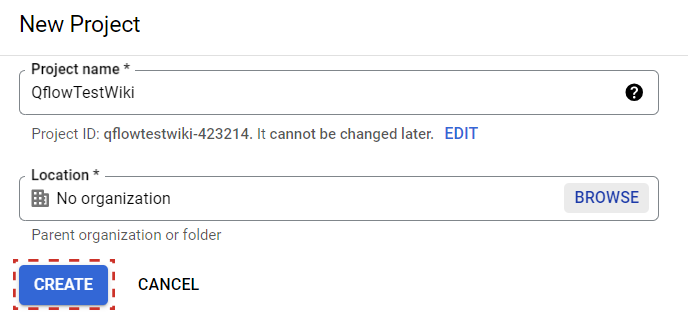
Fig. 847 Project creation view in Google Cloud
Select our new project in the upper combobox.
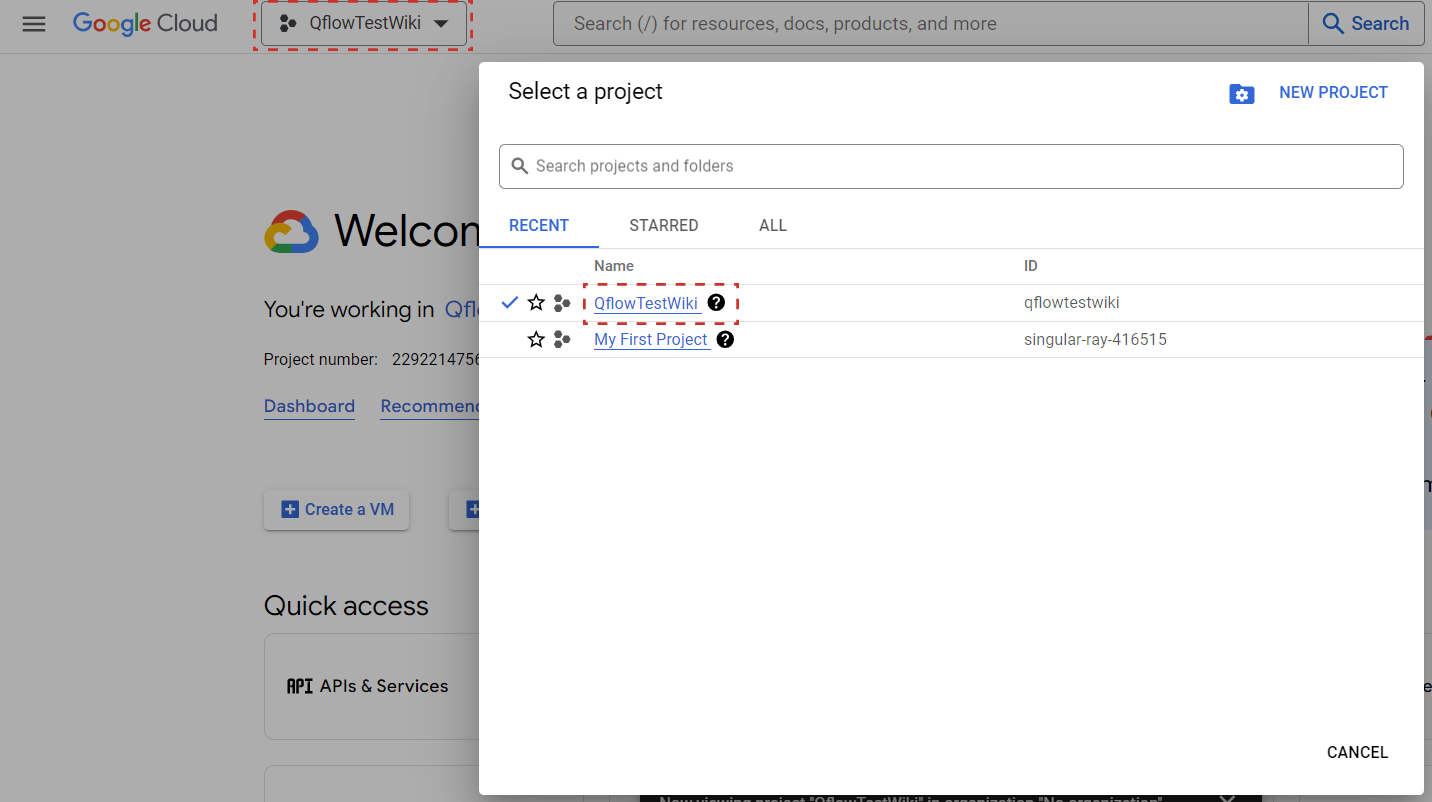
Fig. 848 Project selection view in Google Cloud
In the top search bar look for Google Calendar API, enter it and then click on ENABLE to enable said API in our project.
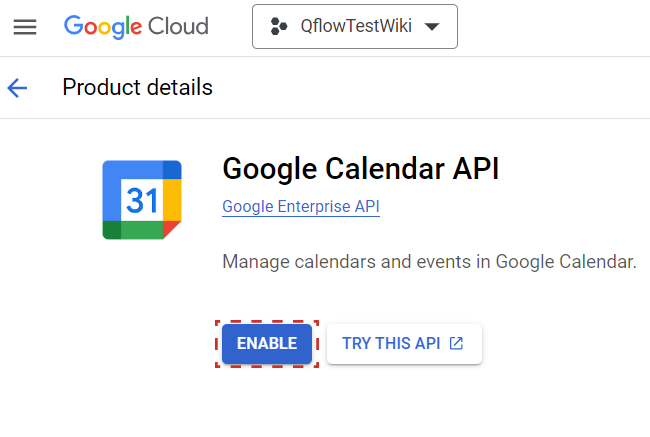
Fig. 849 Button to enable Google Calendar API in our Google Cloud project
In the top search bar look for Service account. We will proceed to create a service account in charge of executing our interactions. In order to accomplish this select CREATE SERVICE ACCOUNT.
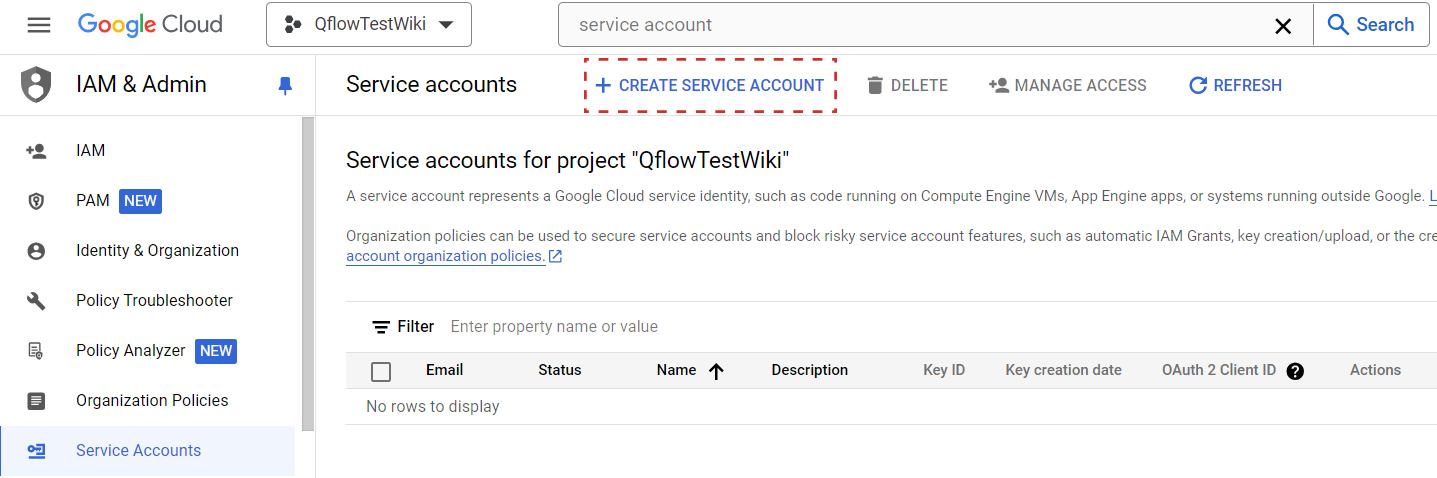
Fig. 850 Option for creating a service account in Google Cloud
Here we must complete Service Account ID. We also recommend completing Service Account Name and Service Account Description as shown in the image below.
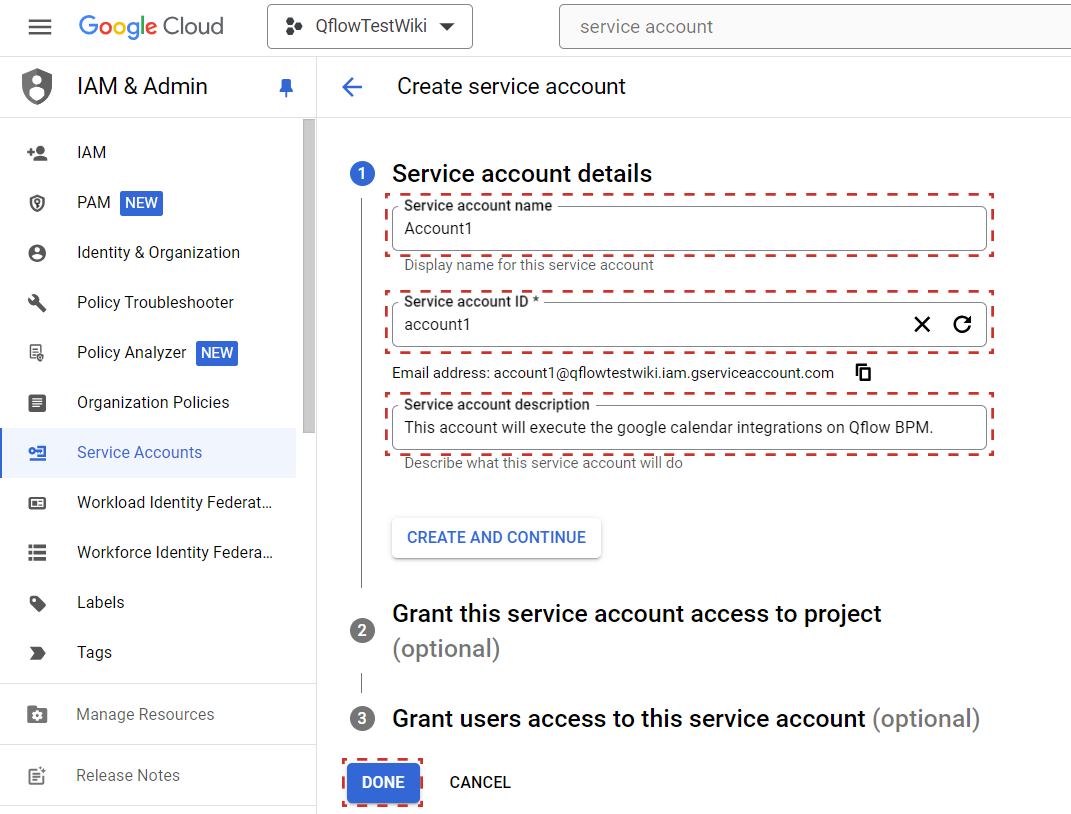
Fig. 851 Service Account fields in Google Cloud
Return to the Service Accounts view, select the created service account and in the Actions section select Manage keys.
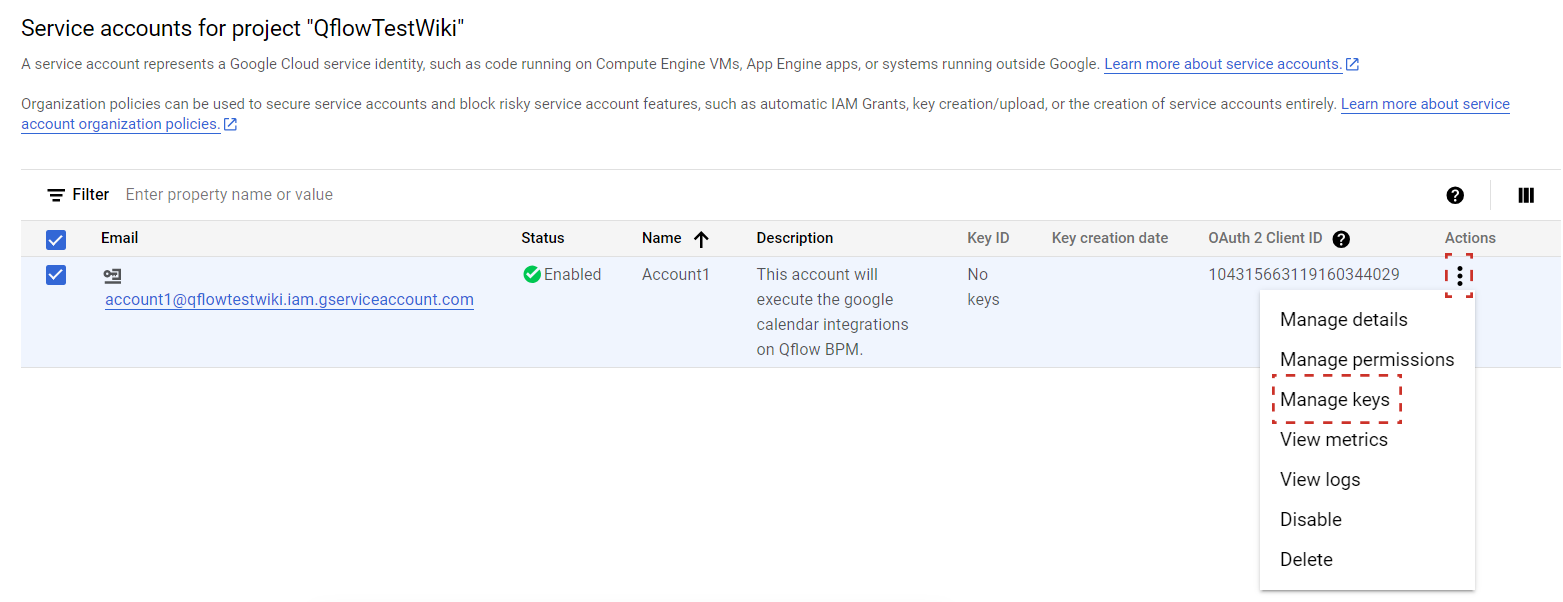
Fig. 852 Manage Keys option for service account in Google Cloud
In this new window we are going to select the Create new key option within the ADD KEY combobox.
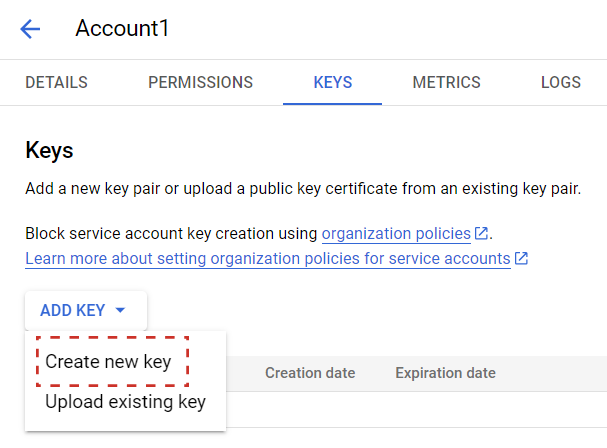
Fig. 853 Option to create a new key for a service account in Google Cloud
Here we select the JSON option and proceed to create the key. A JSON file will automatically be downloaded with the generated private key.
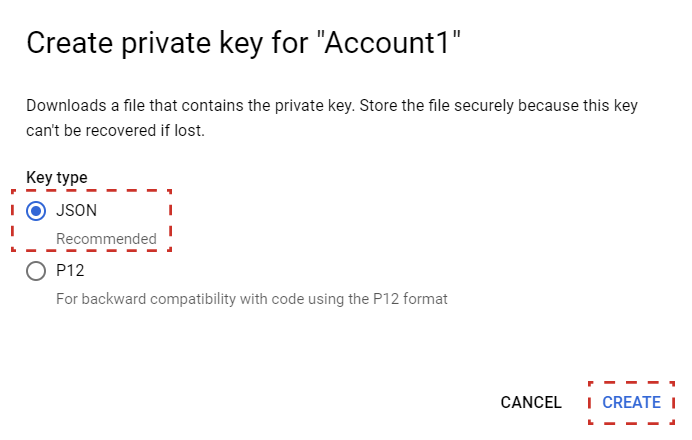
Fig. 854 Private key type selection
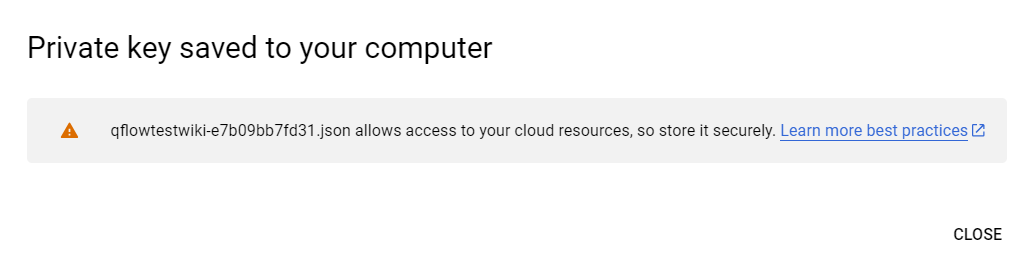
Fig. 855 Key download message generated in Google Cloud
We must write down the OAuth 2 client ID found in the service accounts view identified by the following image:

Fig. 856 Service account OAuth 2 client ID in Google Cloud
Now we will provide our service account with the necessary permissions for its proper functioning. Within our Google Workspace administrator console go to API Controls and select MANAGE DOMAIN-WIDE DELEGATION.
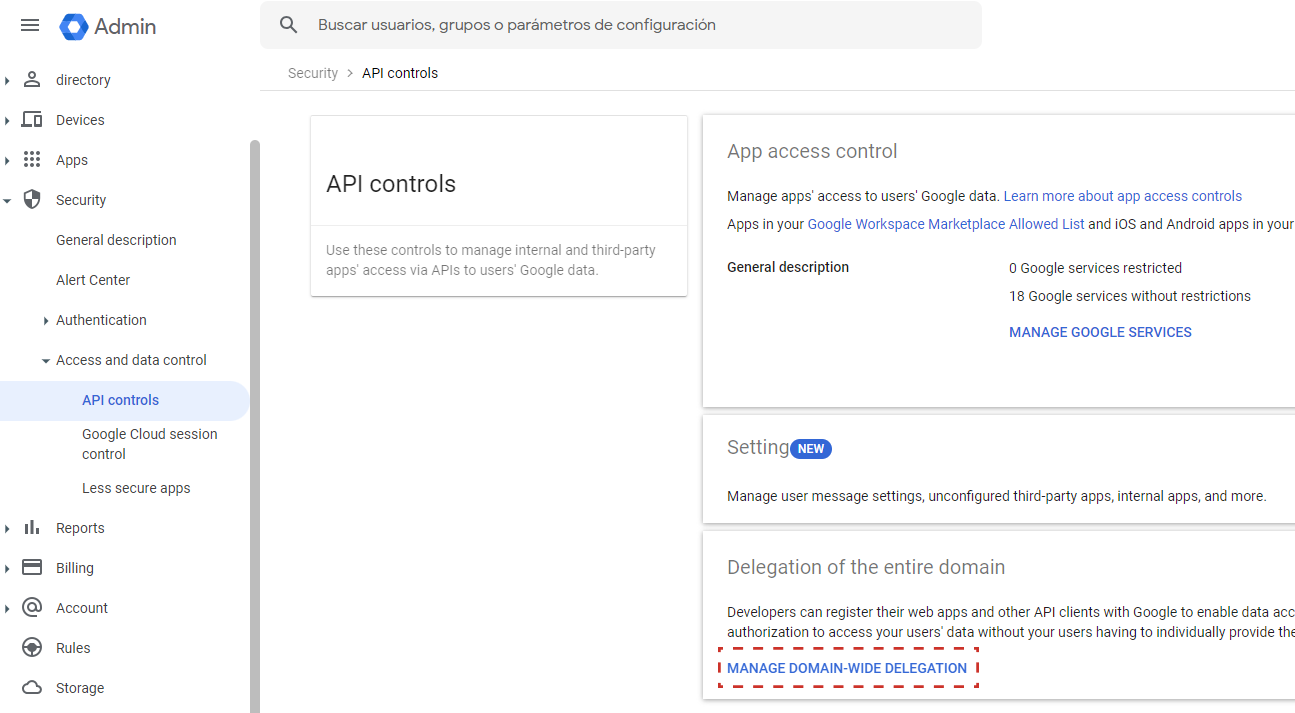
Fig. 857 Option to configure domain-wide delegation in Google Workspace
Here we select Add New to add a new client in our domain-wide delegation configuration.
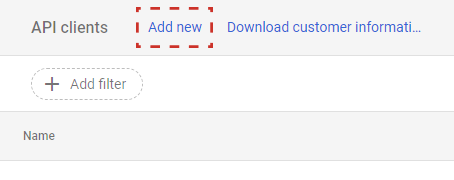
Fig. 858 Button to add new client in domain-wide delegation configuration
Proceed to fill in the Client ID and OAuth Permissions fields with the client ID associated with the service account that we created previously and in OAuth Permissions we only add https://www.googleapis.com/auth/calendar.events.
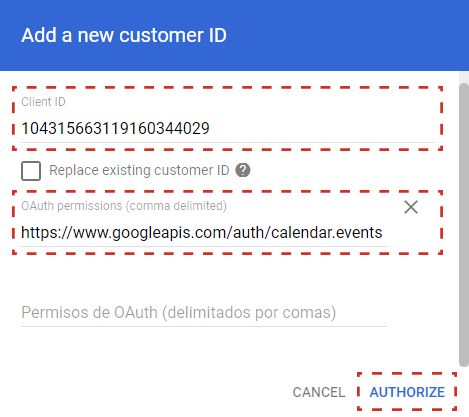
Fig. 859 Filling service account fields to authorize domain permissions
Finally, in the API Clients list we should see our new client added with the previous permission in its list.
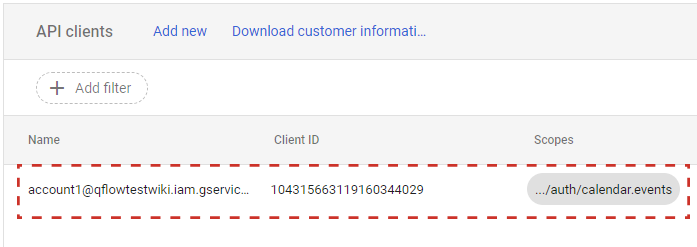
Fig. 860 New service account in API Clients list
Once the above steps are completed, it will be possible to create, update and delete events in Google Calendar from Qflow.
Actions
The following actions can be performed with Google Calendar:
Create event
This action allows you to generate a new event on the selected Google calendar. A start and end date and time must be provided and also an email associated with the organizer of the event. Optionally You can add title, description, location, list of attendees and a calendar Id. It also allows you to generate a Google Meet associated with the new event and you may set if any user can add themselves to this event.
Input |
Description |
Organizer Email |
Required. Email that will appear as the organizer of the event. |
Start date |
Required. Event start date and time. |
End date |
Required. End date and time of the event. |
Title |
Title of the event. |
Description |
Description of the event. |
Location |
Location of the event. |
Generate meet with event |
Allows you to generate a Google meet for the event. |
Any user can auto-add |
Allows you to establish whether users can add themselves to the event. |
List of attendees |
List of emails associated with the event attendees. |
Calendar ID |
Specific ID of the calendar in which the event will be created. |
Output |
Description |
Event Id |
Id generated by Google, associated with the event. |
Update event
This action allows you to update an existing event on the selected Google calendar. A start and end date and time, an email associated with the event organizer and the ID of the event to be updated must be provided. Optionally you can add title, description, location, list of attendees and calendar id. It also allows you to generate, maintain or delete a Google meet associated with the event if it exists and allows you to mark whether or not any user can add themselves to the event.
Input |
Description |
Event Organizer Email |
Required. Email that will appear as the organizer of the event. |
Start date |
Required. Event start date and time. |
End date |
Required. End date and time of the event. |
Event Id |
Required. Id of the event to modify. |
Title |
Title of the event. |
Description |
Description of the event. |
Location |
Location of the event. |
Generate meet with event |
Allows you to generate a Google meet for the event. |
Any user can auto-add |
Allows you to establish whether users can add themselves to the event. |
List of attendees |
List of emails associated with the event attendees. |
Calendar ID |
Specific ID of the calendar in which the event will be modified. |
Output |
Description |
Event Id |
Updated event id. |
Delete event
This action allows you to delete an event on the selected Google calendar. An email associated with the event organizer and the ID of the event to be deleted must be provided. Optionally, you can specify the calendar id to which the event to be deleted belongs.
Input |
Description |
Event Organizer Email |
Required. Event Organizer Email |
Event Id |
Required. Id of the event to delete. |
Calendar ID |
Specific ID of the calendar in which the event will be deleted. |