Jira Cloud
Introduction
The purpose of this manual is to detail how to configure and integrate Qflow with Jira Cloud to allow interaction between both platforms, allowing the creation, moving, editing, and deletion of issues, as well as adding comments.
Jira Cloud has the following actions:
Prerequisites
It is necessary to have an account in Jira Cloud and a workspace created on the platform. You can create an account here.
Application parameter
To establish the connection, it is necessary to have at least one application parameter (see Application parameters) that allows establishing communication between Qflow and Jira Cloud. This parameter can be created from the service task configuration in Qflow, where it is also used to establish communication between Qflow and Jira Cloud. (see Connector Configuration from a Service Task)
To create a Jira Cloud application parameter, the following steps are required as detailed below.
Application parameter using API Token
This type of application parameter requires the following parameters:
API Token: It is a token that allows Qflow to connect to Jira Cloud, simulating being the user who generated it. Every action taken from Qflow will be shown as performed by the user who generated the token.
Jira domain link: It is the link of the Jira Cloud instance to which Qflow will connect. For example, a possible Jira Cloud instance could be https://mycompany.atlassian.net.
User email: It is the email of the user who generated the token from Jira Cloud, the actions taken from the Qflow connector will be shown as performed by this user.
To obtain them, the following steps must be followed:
Access the API Tokens section of Jira Cloud.
Select Create API token.
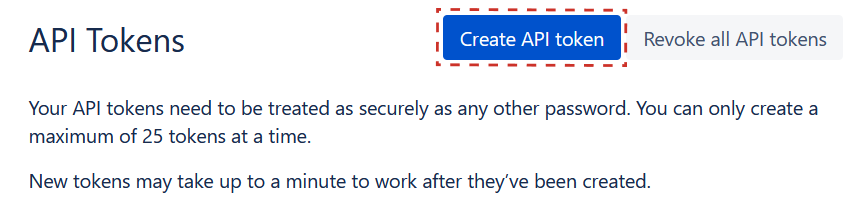
Fig. 825 Create API token marked in the API Tokens section
Write a label to identify the token, for example, Qflow, and select Create.
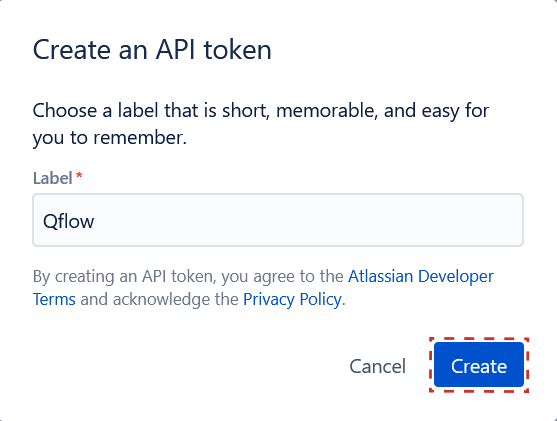
Fig. 826 Section to choose label and create API Token
Copy the generated token, which is the API token needed to configure the application parameter in Qflow. This completes the necessary steps on the Jira Cloud page.

Fig. 827 Generated API Token
In Qflow Design, add the API Token in API Token, the team link in Jira domain link, and the email of the logged-in user when requesting the API Token in User email.
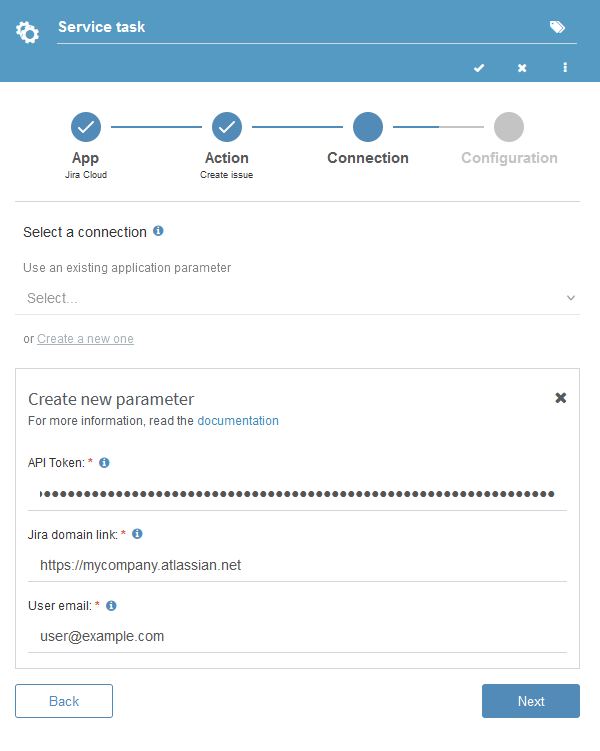
Fig. 828 Required parameters from the application parameter added in Qflow
Once the steps are completed, it will be possible to create, edit, move, delete issues, and add comments in Jira Cloud from Qflow.
Actions
The following actions can be performed with Jira Cloud:
Create issue
This action allows you to create an issue in Jira Cloud. The project name, issue type, and summary must be provided. Optionally, other parameters can be added, which are listed below. After creating the issue, a key is received that identifies the issue in Jira Cloud, allowing it to be edited, moved, deleted, and have comments added later.
Input |
Description |
|---|---|
Project Name |
Required. Name of the Jira Cloud project where the issue will be created. |
Issue type |
Required. Type of issue to be created. For example, ‘Task’, ‘Story’, among others. Issue types can be translated, the translation can be edited by the Jira team, it is also possible to add custom issue types. The parameters can be in the language used by the user who configured the connection with Jira Cloud, and also in English. That is, for example, if the user who configured the connection with Jira Cloud has set up their account in a language other than English, the names of the issue types can be written in that language and in English. |
Summary |
Required. Summary of the issue to be created. |
Priority |
Priority of the issue to be created. For example, ‘High’, ‘Medium’, ‘Low’. Custom or team-added issue parameters can be used. |
Due date |
Due date of the issue to be created. |
Description |
Description of the issue to be created. |
Assigned username |
User assigned to perform the issue. You must write their username. |
Reporter username |
User who reports the issue. You must write their username. |
Labels |
They are used to classify and search for issues. Multiple labels can be assigned to a single issue and they must not contain spaces. |
Fix versions |
Write the name of the fixed version. Multiple versions can be assigned to a single issue. |
Extra fields JSON |
If you want to add custom parameters to the issue, you must write a JSON with the parameters and values you want to add. It is useful for adding parameters to the issue to be created that are not defined in the action. The added parameters must be enabled in your Jira Cloud configuration. The Jira Cloud documentation can be used as a reference to know how to structure the JSON to add only the extra parameters you want. Consider that the content you write will be unified with the JSON sent to Jira Cloud. For example, if you want to add that the created issue is a child of another issue, you can add the parent parameter with the JSON |
Output |
Description |
|---|---|
Issue key |
Key that identifies the issue created in Jira Cloud. It can be used to edit, move, delete, and add comments to the issue. |
Add comment to issue
This action allows you to add a comment to an issue in Jira Cloud. The issue key and the comment to be added must be provided. After creating the comment, an identifier of the comment is received.
Input |
Description |
|---|---|
Issue key |
Required. Key of the issue to which the comment is added. |
Comment |
Required. Comment added to the issue. |
Output |
Description |
|---|---|
Comment ID |
Identifier of the comment added to the issue in Jira Cloud. |
Update due date on issue
This action allows you to update the due date of an issue in Jira Cloud. The issue key and the new due date must be provided.
Input |
Description |
|---|---|
Issue key |
Required. Key of the issue to which the due date will be updated. |
Due date |
Required. New due date of the issue. If you want to remove the due date, the parameter must be left empty. |
Update priority on issue
This action allows you to update the priority of an issue in Jira Cloud. The issue key and the new priority must be provided. The priority can be ‘High’, ‘Medium’, ‘Low’, or any other priority defined in Jira Cloud.
Input |
Description |
|---|---|
Issue key |
Required. Key of the issue to which the priority will be updated. |
Priority |
Required. New priority of the issue. It can be ‘High’, ‘Medium’, ‘Low’, or any other priority defined in Jira Cloud. If you want to remove the priority, the parameter must be left empty. |
Update issue status
This action allows you to update the status of an issue in Jira Cloud. The issue key and the new status to move to must be provided. The status can be ‘To do’, ‘In Progress’, ‘Done’, or any other status defined in Jira Cloud. Statuses can be translated or added, the translation can be edited by the Jira team. It is also possible to add custom parameters to the issue, for this, a JSON with the parameters and values you want to add must be added.
Input |
Description |
|---|---|
Issue key |
Required. Key of the issue to which the status will be updated. |
Column name |
Required. New status of the issue. It can be written in English or translated if the team uses a different language. |
Extra fields JSON |
If you want to add custom parameters to the issue, you must write a JSON with the parameters and values you want to add. It is useful for adding parameters to the issue to be created that are not defined in the action. The added parameters must be enabled in your Jira Cloud configuration. The Jira Cloud documentation can be used as a reference to know how to structure the JSON to add only the extra parameters you want. Consider that the content you write will be unified with the JSON sent to Jira Cloud. For example, if you want to add that the created issue is a child of another issue, you can add the parent parameter with the JSON |
Update assignee
This action allows you to update the user assigned to an issue in Jira Cloud. The issue key and the username of the new assignee must be provided.
Input |
Description |
|---|---|
Issue key |
Required. Key of the issue to which the assignee will be updated. |
Assigned username |
Required. Username of the new assignee to the issue. If you want to remove the assignee, the parameter must be left empty. |
Delete issue
This action allows you to delete an issue in Jira Cloud. The issue key to be deleted must be provided.
Input |
Description |
|---|---|
Issue key |
Required. Key of the issue to delete. |
Add attachment to issue
This action allows sending attachments directly from Qflow to an issue in Jira Cloud. The issue key and the files to be attached must be provided.
Input |
Description |
|---|---|
Issue key |
Required. Key of the issue to which the files will be attached |
Attached files |
Required. Files to be sent to the incident in Jira Cloud. The size of each file must not exceed 10 MB. |